M107 Self Propelled Gun Part 2

Last night I started working on the gun for the M107. The gun is interesting because it has lots of moving parts that you have to make sure are not glued. It is also massive and I have no idea how this thing will fit into a display case.

20180501203508

I could not resist test fitting it to the hull to see how it looked. It still needs some cleaning up and a few more parts added before being painted.

20180501203441

M107 Self Propelled Gun Part 1

I have not posted on this blog in some time and its been even longer since I have posted about a plastic kit.

A lot has happened since then including moving into my own place which I have built a basement workbench in. This has solved one the main barriers to modelling I had which was having to pack my modelling stuff up from the dining room table after each session.

I have a number of part built kits to resume but I decided to start a fresh with this great kit. I have been looking forward to building it for a while as its something a little different from the usual tank. Its an Italeri kit sold as a Tamiya with some Tamiya figures so a bit of an odd one.

packagelarge[1]

Being an Artillery piece with a massive gun should make for an impressive model when complete. So far I have built and painted the chassis and dozer blade. The blade can be moved which is demonstrated in the video below.


Tamiya 1:35 King Tiger Radio Control Part 4

IMAG2023

The Tiger 2 is almost complete. The spare tracks have been added to the turret and any accessories have been attached to the tank hull. From the above Continue reading Tamiya 1:35 King Tiger Radio Control Part 4

Tamiya 1:35 King Tiger Radio Control Part 3

IMAG1961

The next thing to do on my tiger 2 was to add the decals and tank commander. I applied the decals to a layer of varnish and then varnished Continue reading Tamiya 1:35 King Tiger Radio Control Part 3

Tamiya 1:35 King Tiger Radio Control Part 2

IMAG1947

Next on my todo list is finishing off the r/c Tiger 2 that I started last year.

IMAG1951

The upper hull turret and barrel is air brushed dunkel gelb.

IMAG1957

After the main coat was applied I hand painted on a red brown camouflage pattern.

M4A3E8 Sherman “Easy Eight” “Fury”

When I start getting back into my models I always end up buying more kits even if my pile is not getting any smaller.

I was pleasantly surprised to find a Fury kit as I was not aware that one existed. I know people have been doing custom Fury builds but
Continue reading M4A3E8 Sherman “Easy Eight” “Fury”

Chinese Type 59 Tank

I intended go get some modelling done over the Christmas break but that did not happen. So over the last week I decided to finish of my Italeri World of Tanks Type 59 1:35 kit.

I picked this kit up at Tankfest
Continue reading Chinese Type 59 Tank

Tamiya 1:35 King Tiger Radio Electronics and Lower Hull

IMAG1467

Over the weekend I decided to focus on the lower hull of this kit. That way I could start playing about with the electronics and get the thing moving.

IMAG1468

The first thing to do was to start masking areas that should not be painted. These are areas where the wheels will be attached Continue reading Tamiya 1:35 King Tiger Radio Electronics and Lower Hull

Tamiya 1:35 King Tiger Radio Control

The problem I find with R/C vehicles is they take up a lot of space considering how often I use them. I stumbled across (and won) one of these great kits on eBay the other day. I did not even know these kits existed!

They are Tamiya 1:35 static kits modified to take R/C components giving you a highly detailed R/C model. This one is from 2001 and they seem pretty rare. There are some pre-built 1:35 models around abroad but these seem to have some ugly ir sensor on top of them.

IMAG1450

This is what you get in the R/C box alongside the kit. There are motors and gears for the drive and turret rotation along with some extra parts to convert the static model to R/C.

IMAG1457

This is the model kit itself. I looks like it comes with stronger tracks that you would get with the static model.

IMAG1452

I purchased some after market options for my build. The first is a zimmerit sheet. This give the surfaces a texture representing the paste that was put on some armour to prevent magnetic mines from sticking to the hull.

IMAG1455

The second upgrade I went for was the photo etched grills. I did no realise at first but you also get a sight for the turret gun as well.

IMAG1459

I started the kit by glueing the photo etched parts into place.

IMAG1460

Next I started adding the zimmerit. I had to cut out areas on the sheet with a modelling knife where any parts would stick out from. First up was the rear hull.

IMAG1461

Next I added zimmerit to the front lower hull.

IMAG1462

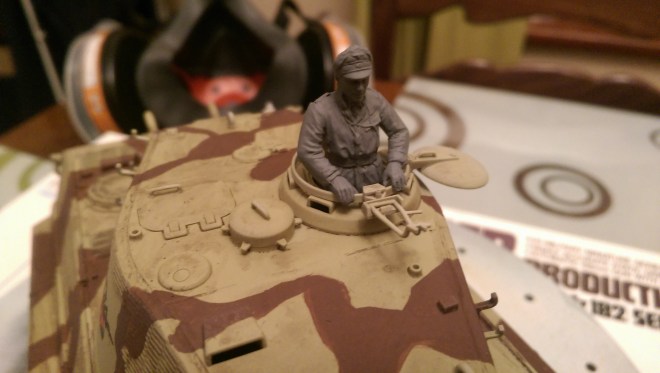
Finally I added the zimmerit sheets to the turret sides. On each side a large square is cut out for the unit markings to sit in.

That’s all for now, more on this build soon!

Flames of War Tiger Tank

I felt like doing a bit of hand painting this week and decided to give the Flames of War Tiger tank I built a go.

IMAG1279

I thought it would be nice to go for a simple camouflage pattern and decided on green and brown stripes over the yellow base coat. The green looked pretty horrific Continue reading Flames of War Tiger Tank