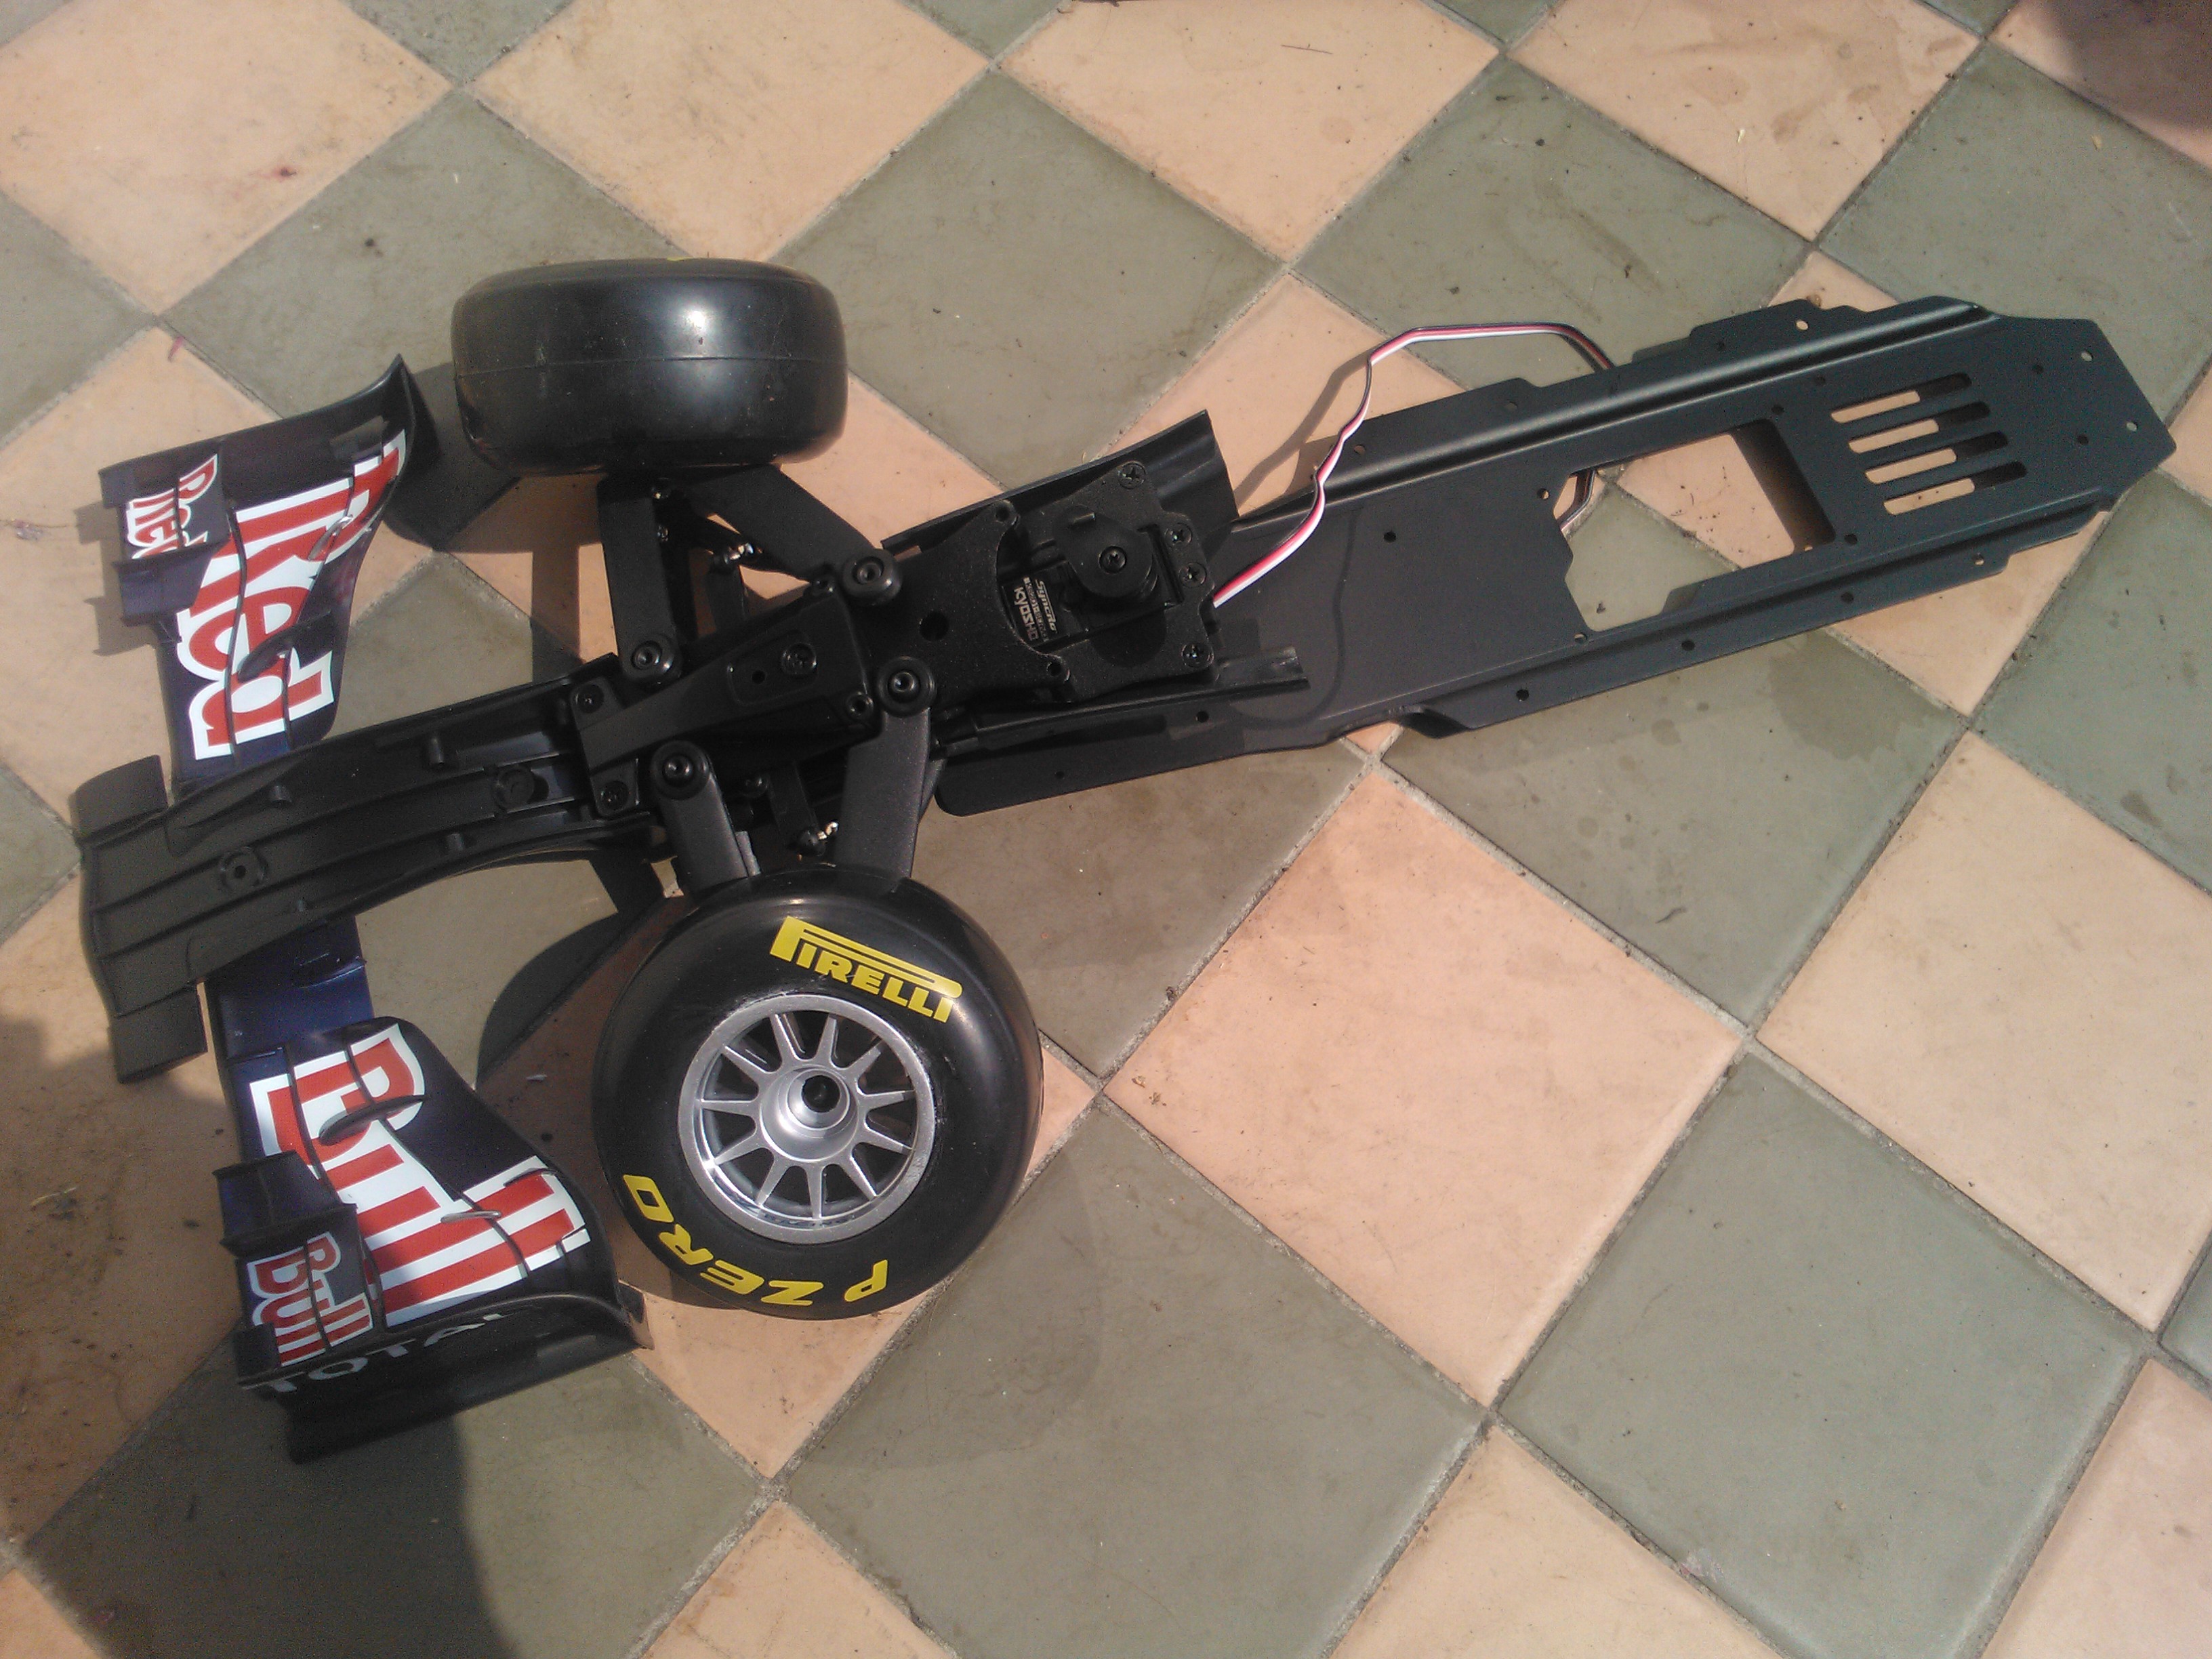
Open RC F1 Improvements

Front Axles

As seen in my last post there were a few issues with my open RC build that needed resolving. The first was the front wheel axle snapping. I have since printed a whole collection of front axles with 100 % infill (solid). This makes them much stronger than when they were only 20%. As I printed a whole bunch I have spares at the ready if I need them.

IMG_20190216_133119840


Steering

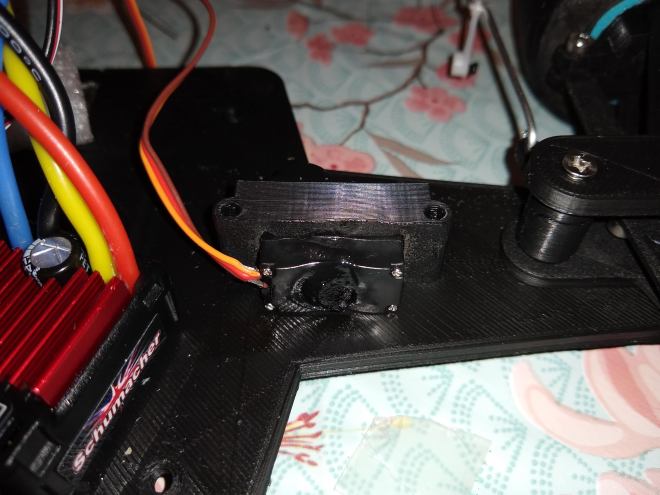
The next thing to look at was the steering. Here I was having issues with the servo not centering the wheels with no input. This indicated there were binding issues but it seems the servo may have also been at fault. While playing with the trim settings on the transmitter the servo went crazy and melted itself. There was a lot of smoke coming out so I quickly ripped out the Lipo battery and took the car outside. The house stunk of burnt electronics.

IMG_20190216_133553988

The offending item was removed and remarkably caused no warping to the PLA chassis.

IMG_20190216_144047810

I fitted a new servo and adjusted how the servo linkage worked to make the wire straighter.

IMG_20190216_152137592

I also used  a multitool to sand down the inside of the car body so that the servo rod no longer snagged on it. Lastly I added a washer between the servo saver and lower chassis.

These things combined have fixed the steering issues I was having. The steering now centers itself and responds a lot better than before.

Tyres

I have been having a lot of fun printing TPU tyres at different settings and have made some progress with regards to producing tyres with more grip.

IMG_20190216_153849949

That said the TPU tyres always lacked the grip of a rubber tyre so I caved in and brought some Tamiya tyres. I will go back to TPU when making a heavy vehicle as part of the problem is that the f1 car is so light the tyres are not creating much friction with the ground.

IMG_20190217_130634631

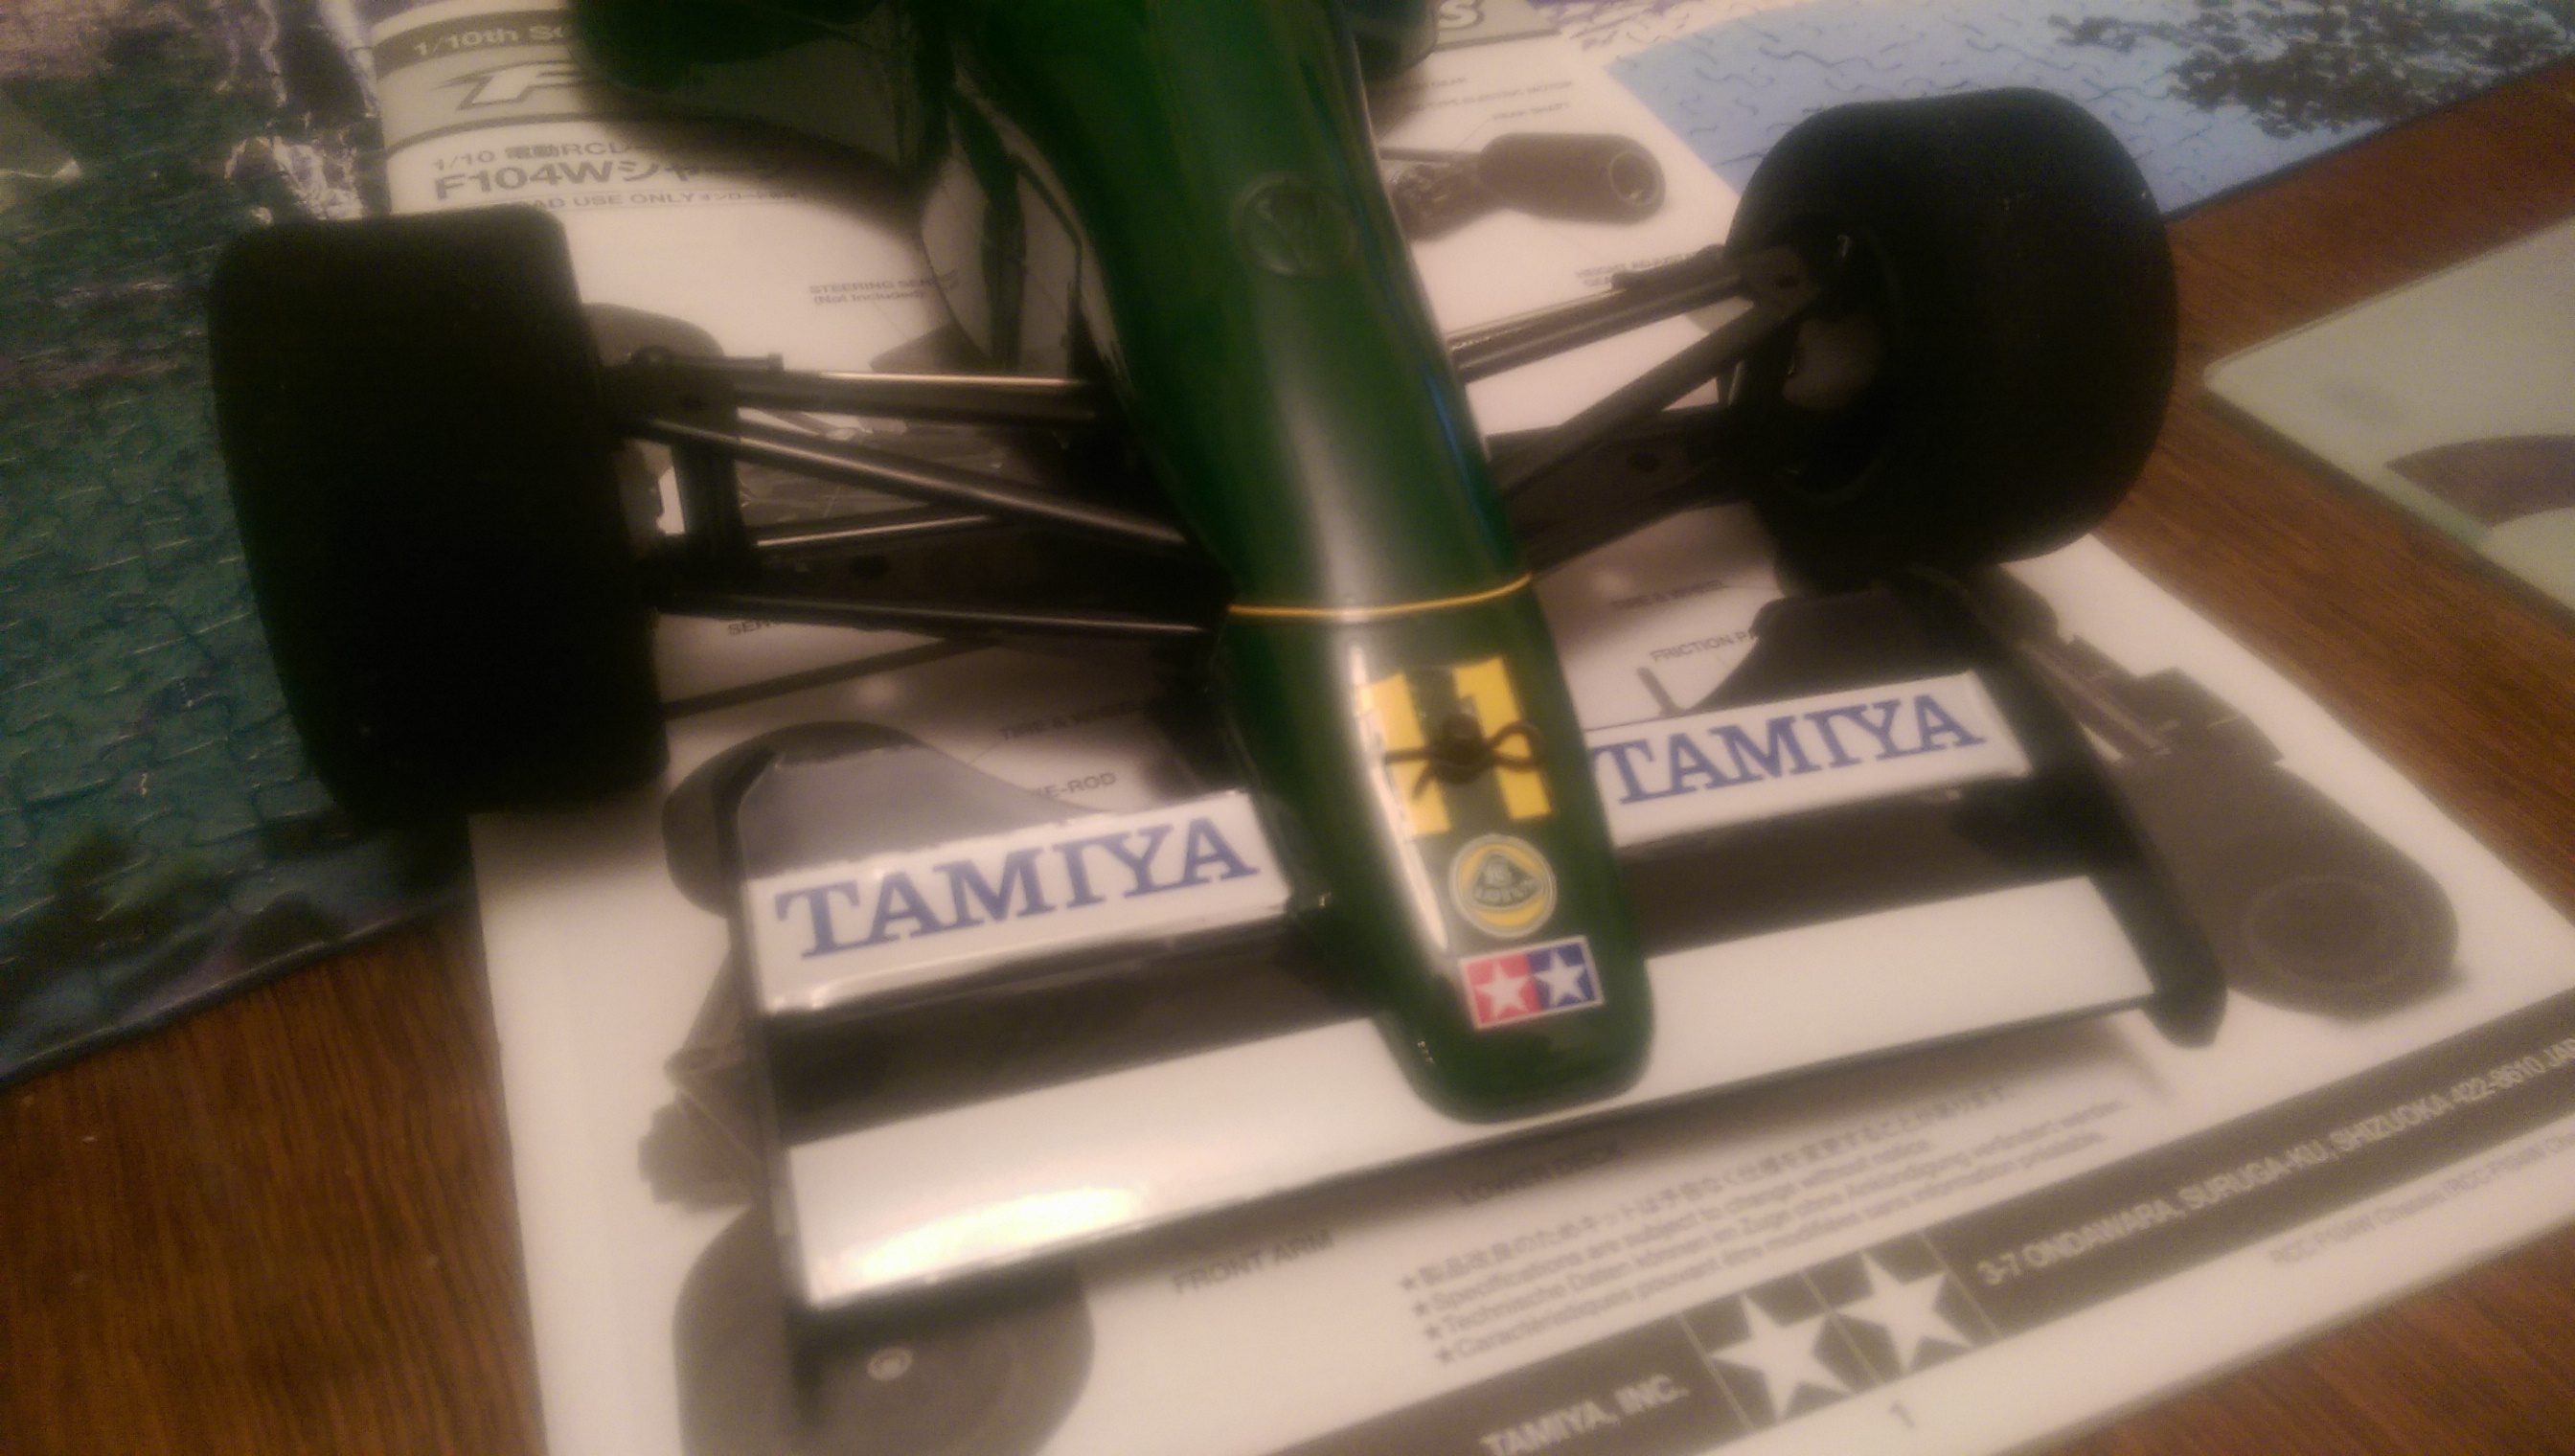
The Tamiya tyres. I had no idea that these came in different compounds so I ended up with super soft rear tyres and standard front ones.

IMG_20190217_203549525

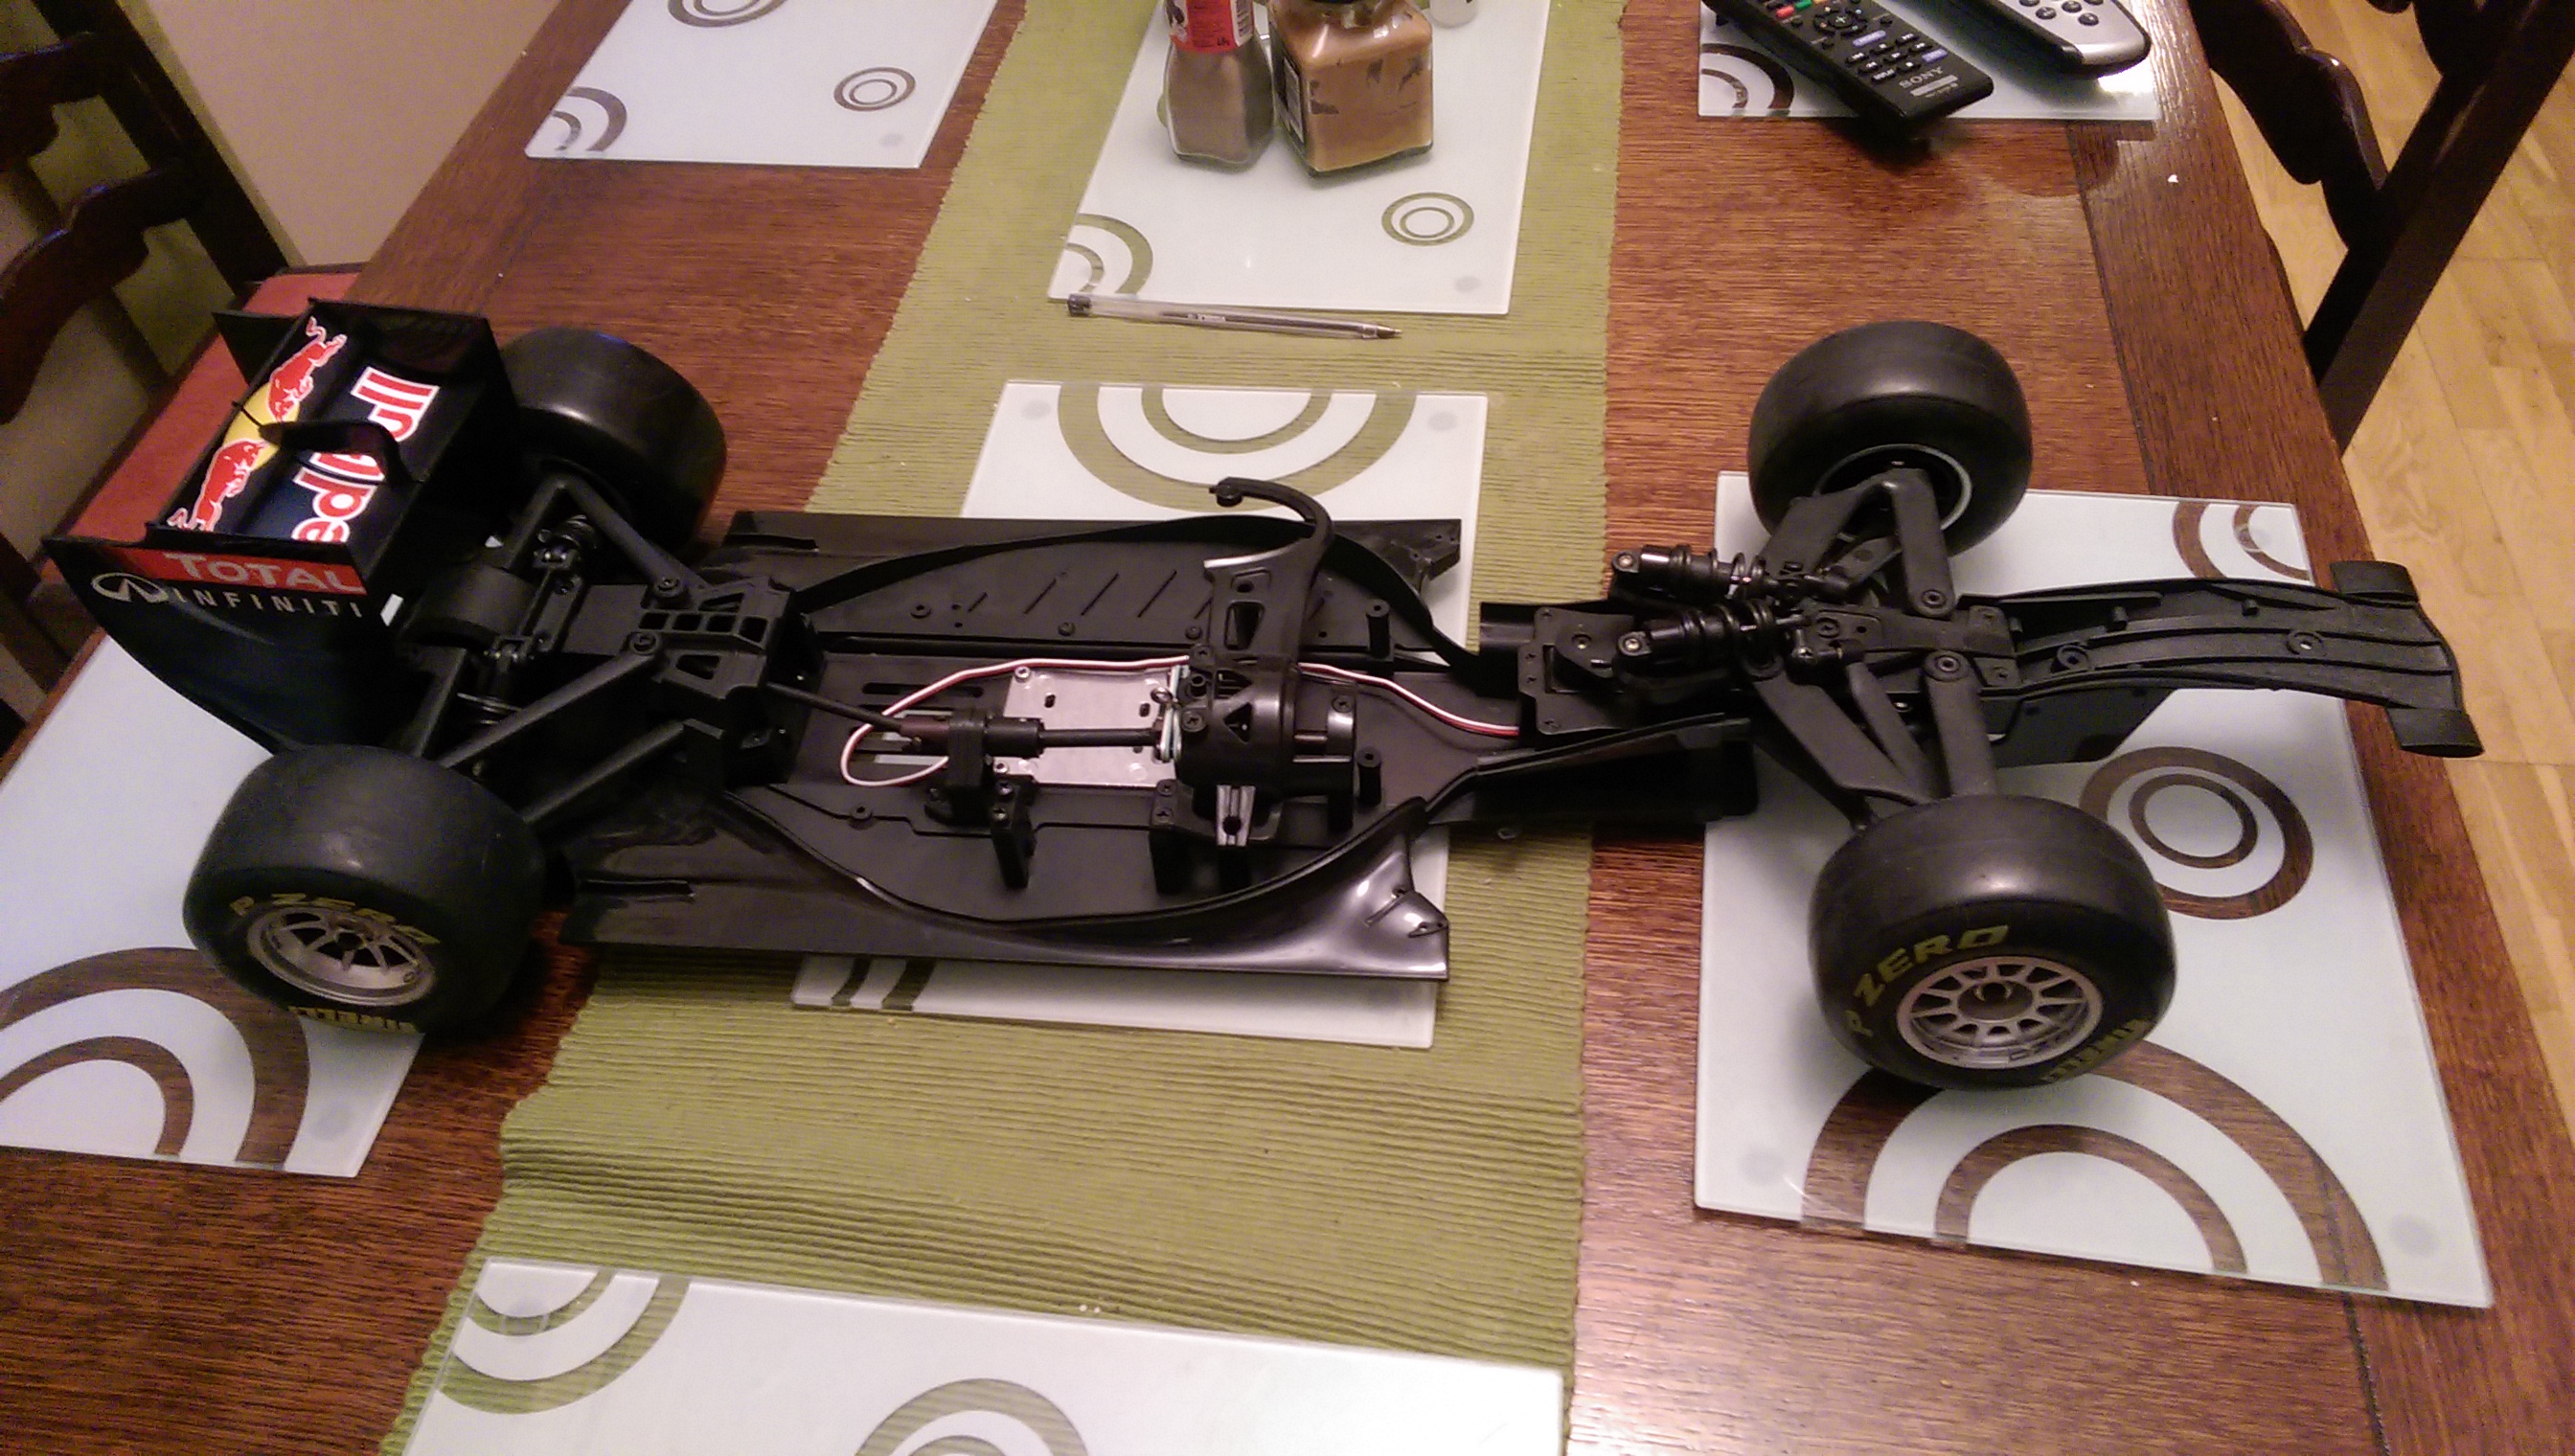
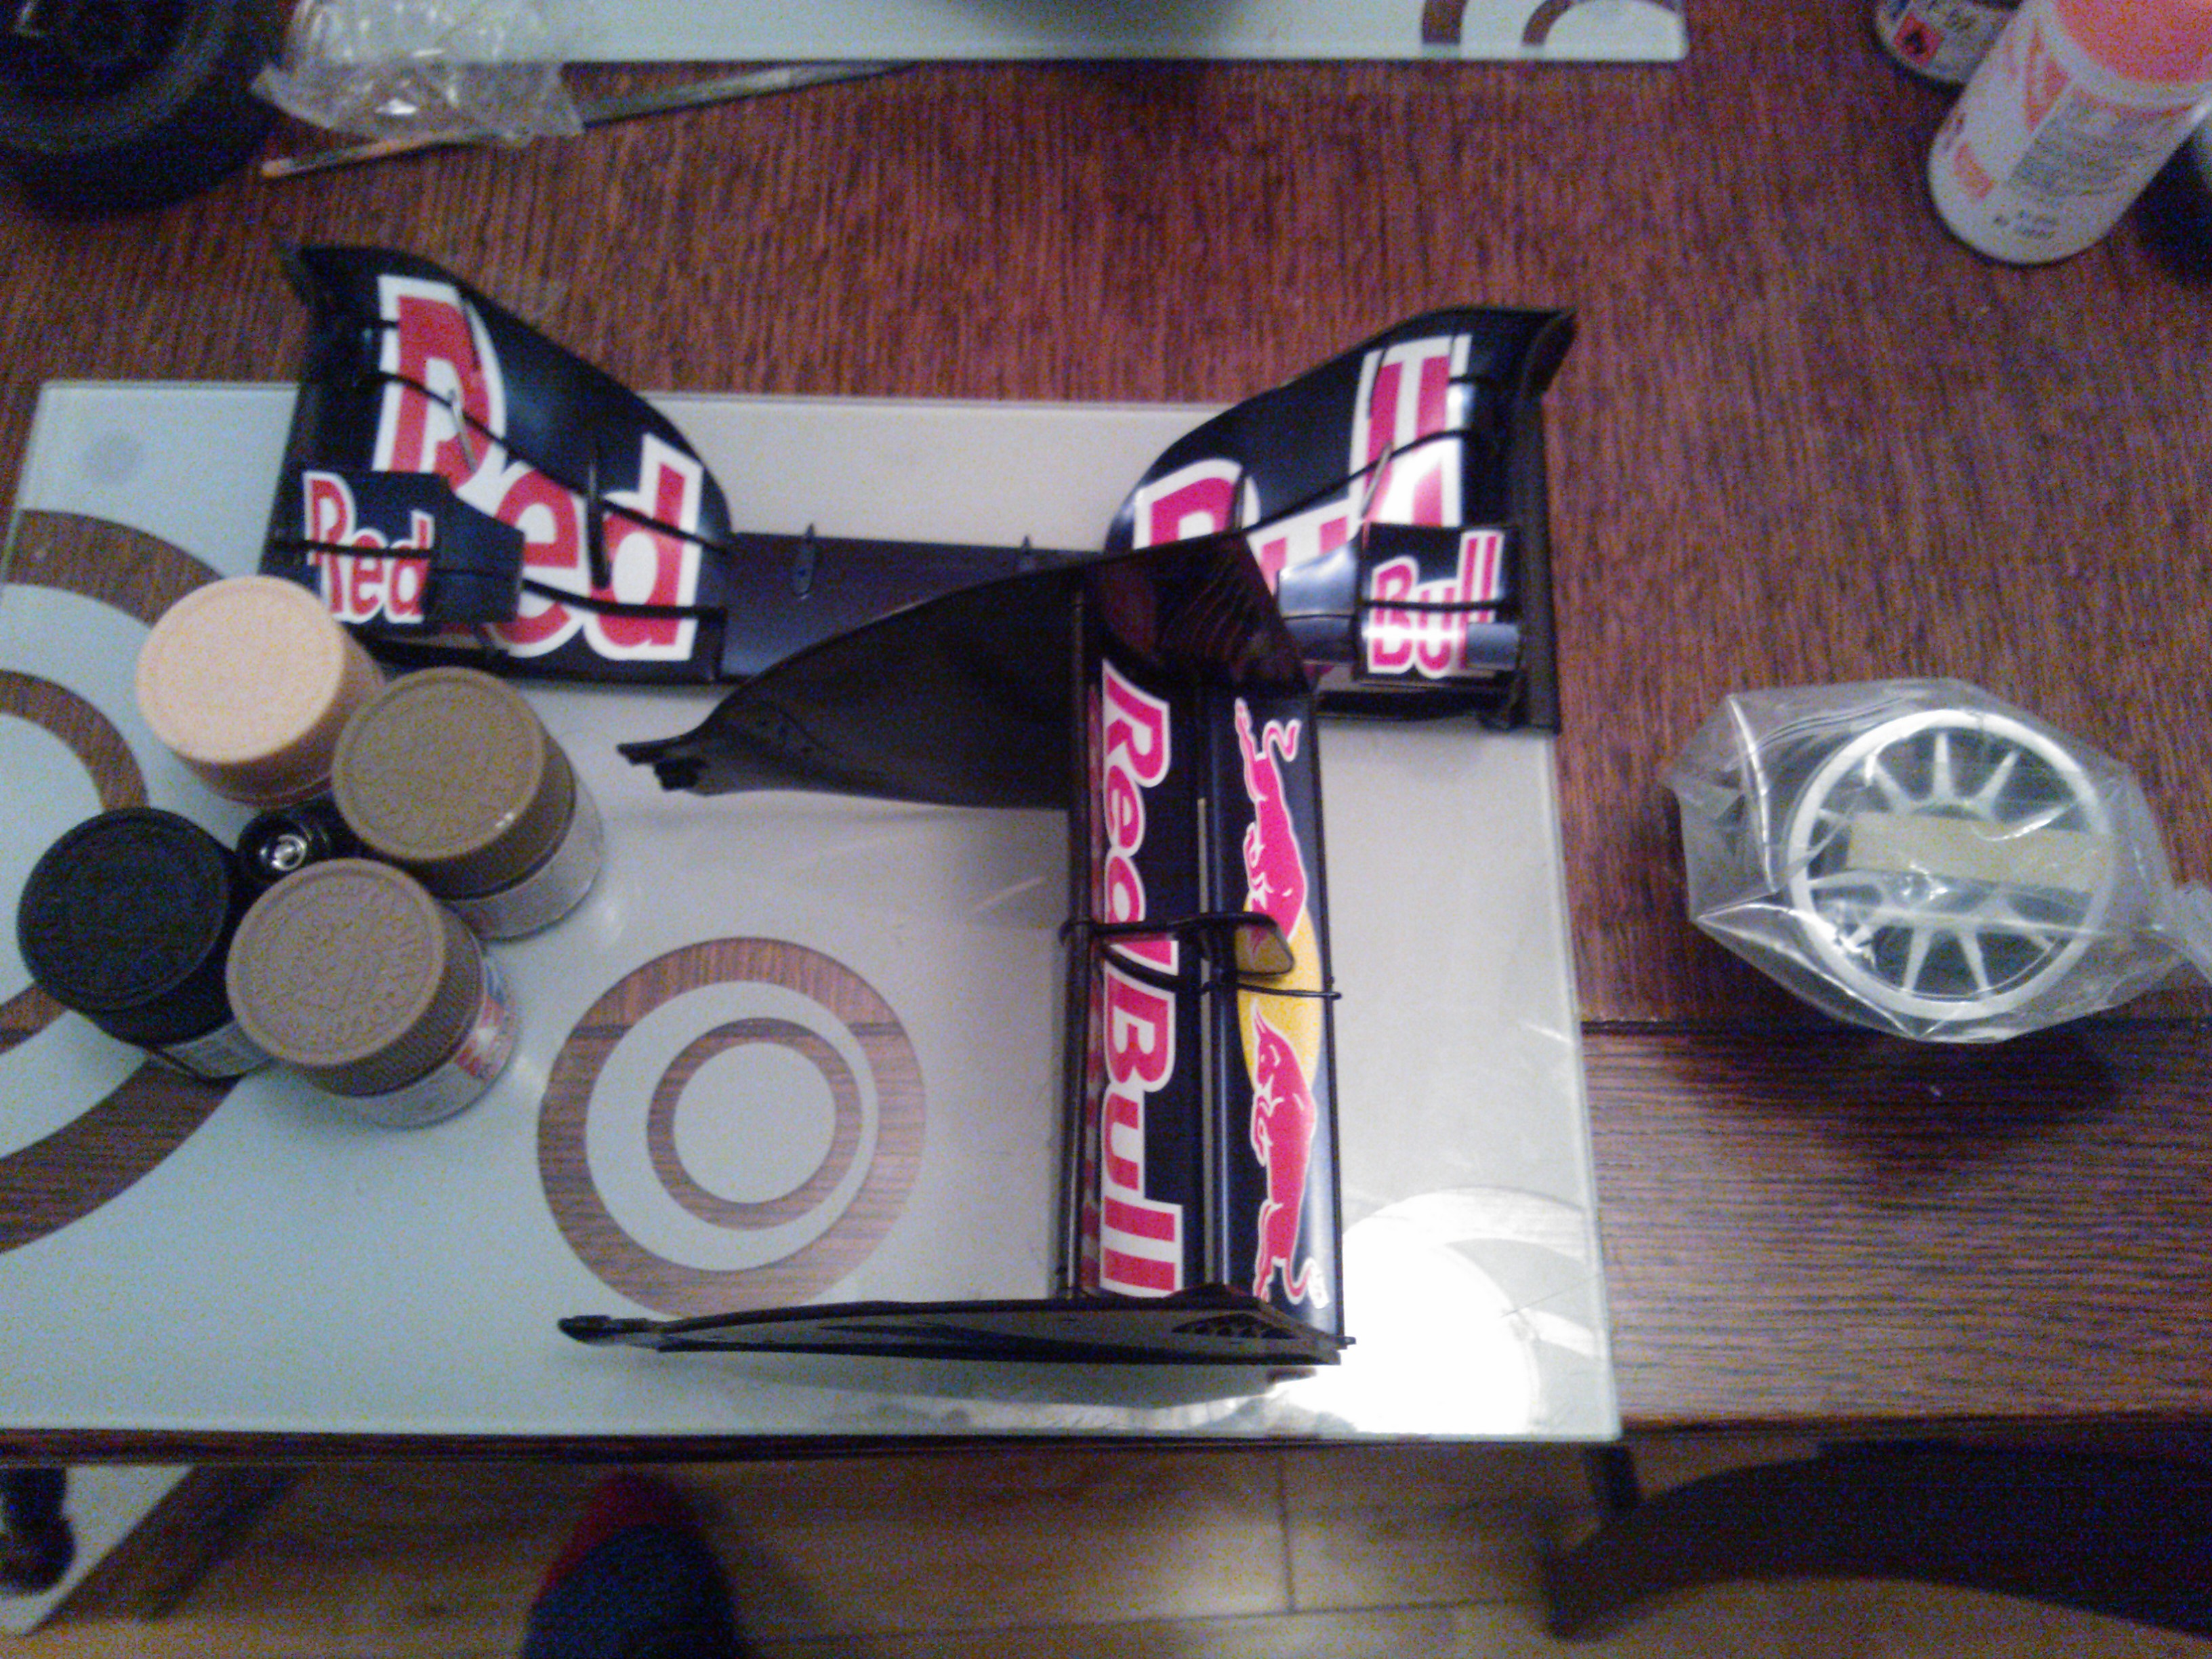
New rims had to be printed for the Tamiya tyres and the wheel ends up a bit bigger than the printed tyre version. You can see that the rear tyre almost touches the bargeboard. This is good as it increases ground clearance a little which should lead to less damage when driving over uneven terrain.

I have only tested the Tamiya tyres indoors at the moment on wooden floor but I can already tell they perform miles better than the TPU tyres. I did make a second video however of my second generation TPU tyres at the weekend. These were a step up from my previous attempt which were much too hard. These are printed at 10%. I still have not had much success with printing them at 5% at all.

Next time with the rubber tyres the lack of grip should be a thing of the past!

Open RC F1 Car Part 1

I recently built a new 3D printer having wanted a bigger build bed and to go back to open printing. I went for the Ender 3 Pro which has turned out to be a great machine for the price.

I have always wanted to print and build an Open RC car but did not have a big enough print bed to print the parts. Now I do however so I thought it would make a good test for my new printer. All of this model apart from the Tyres will be printed in PLA. The Tyres will be printed in TPU so that they are flexible.

IMG_20190131_072732324 - Copy

The first thing I did was to try printing the chassis. I printed this with a bit more infill than the rest of the parts to make it stronger. The chassis parts and the rear axle holders were printed at 35% infill. Continue reading Open RC F1 Car Part 1

Red Bull 7 Preparing the Bodyshell

SAM_5852

I did not intend to do any actual work on the display body as it requires removing the engine head to fit. My plan was to just wait for the display body.

SAM_5854The long awaited racing body arrived last week and was found in my local green Continue reading Red Bull 7 Preparing the Bodyshell

Tamiya Lotus F1 type 102B RC Kit Part 1

This was a Christmas present I have been working on over the past few weeks.

IMAG0685

There are a few reasons I like this kit.

The first is the car has the classic F1 shape that has been lost over the years as aerodynamics technology has moved forward.

The other main reason is the style. I like racing green and this kit reminds me of the recent all green Caterham F1 cars.

Lastly the year this car ran Team Lotus were sponsored by Tamiya which I thought was quite cool since it is a Tamiya kit.

Continue reading Tamiya Lotus F1 type 102B RC Kit Part 1

Red Bull 7 Progress

IMAG0458In this section of the Red Bull  build I have almost finished building the engine, its nearly ready to be fitted to the chassis.

IMAG0466

The final tyre has also been added to the car. This is great because I finally have all four wheels on the model but annoying because it has now out grown its old living space.

IMAG0464

With this 1:7 model and the 1:8 Hummer I am building its getting hard to find space to store these models.

IMAG0462


First parts of engine have arrived for my Kyosho Red Bull 7 build

The crankcase is the first part of the GX21 Nitro engine which will power my Red Bull 7 model. The GX21 is a 2 stroke engine capable of producing about 1.8bhp.

IMAG0099

The crankcase currently contains the carburetor attaching screw and two ball bearings.

IMAG0102

With the next batch of parts I get the crankshaft piston, cylinder head and rear engine plate.

IMAG0103

Build your own Red Bull 7 (first batch of parts)

My first batch of parts for the Red Bull 7 kit arrived today.

The parts include bits of the front wing, rear wing, a wheel and an oil filled shock to build.

The front wing had some small parts that were pretty annoying to fit but I got there in the end.

You can see the oil filled shock balanced between paint pots in the photo.

This is to let the oil spread around the shock assembly and remove pockets of air.

First batch of RB7 parts