

The chassis for this car was pretty quick and easy to build. I used a receiver from Continue reading Blitzer Beetle Chassis and Motor
The chassis for this car was pretty quick and easy to build. I used a receiver from Continue reading Blitzer Beetle Chassis and Motor

I have started spraying the main body of my blitzer beetle. Continue reading Tamiya Blitzer Beetle Part 2

I have a new RC car to build, this is an Volkswagen Beetle off road buggy.
I did not realise until recently that there are a fair few hard body kits available. I prefer these as you can add much more detail than you can with Continue reading Tamiya Blitzer Beetle Build 1:10
This was a Christmas present I have been working on over the past few weeks.

There are a few reasons I like this kit.
The first is the car has the classic F1 shape that has been lost over the years as aerodynamics technology has moved forward.
The other main reason is the style. I like racing green and this kit reminds me of the recent all green Caterham F1 cars.
Lastly the year this car ran Team Lotus were sponsored by Tamiya which I thought was quite cool since it is a Tamiya kit.
You may have seen a long time ago I made a post with a load of blue aluminium upgrades for my tt01 car. Well I completely forgot about the oil filled shocks shown in that post and have just got round to building them and installing them.
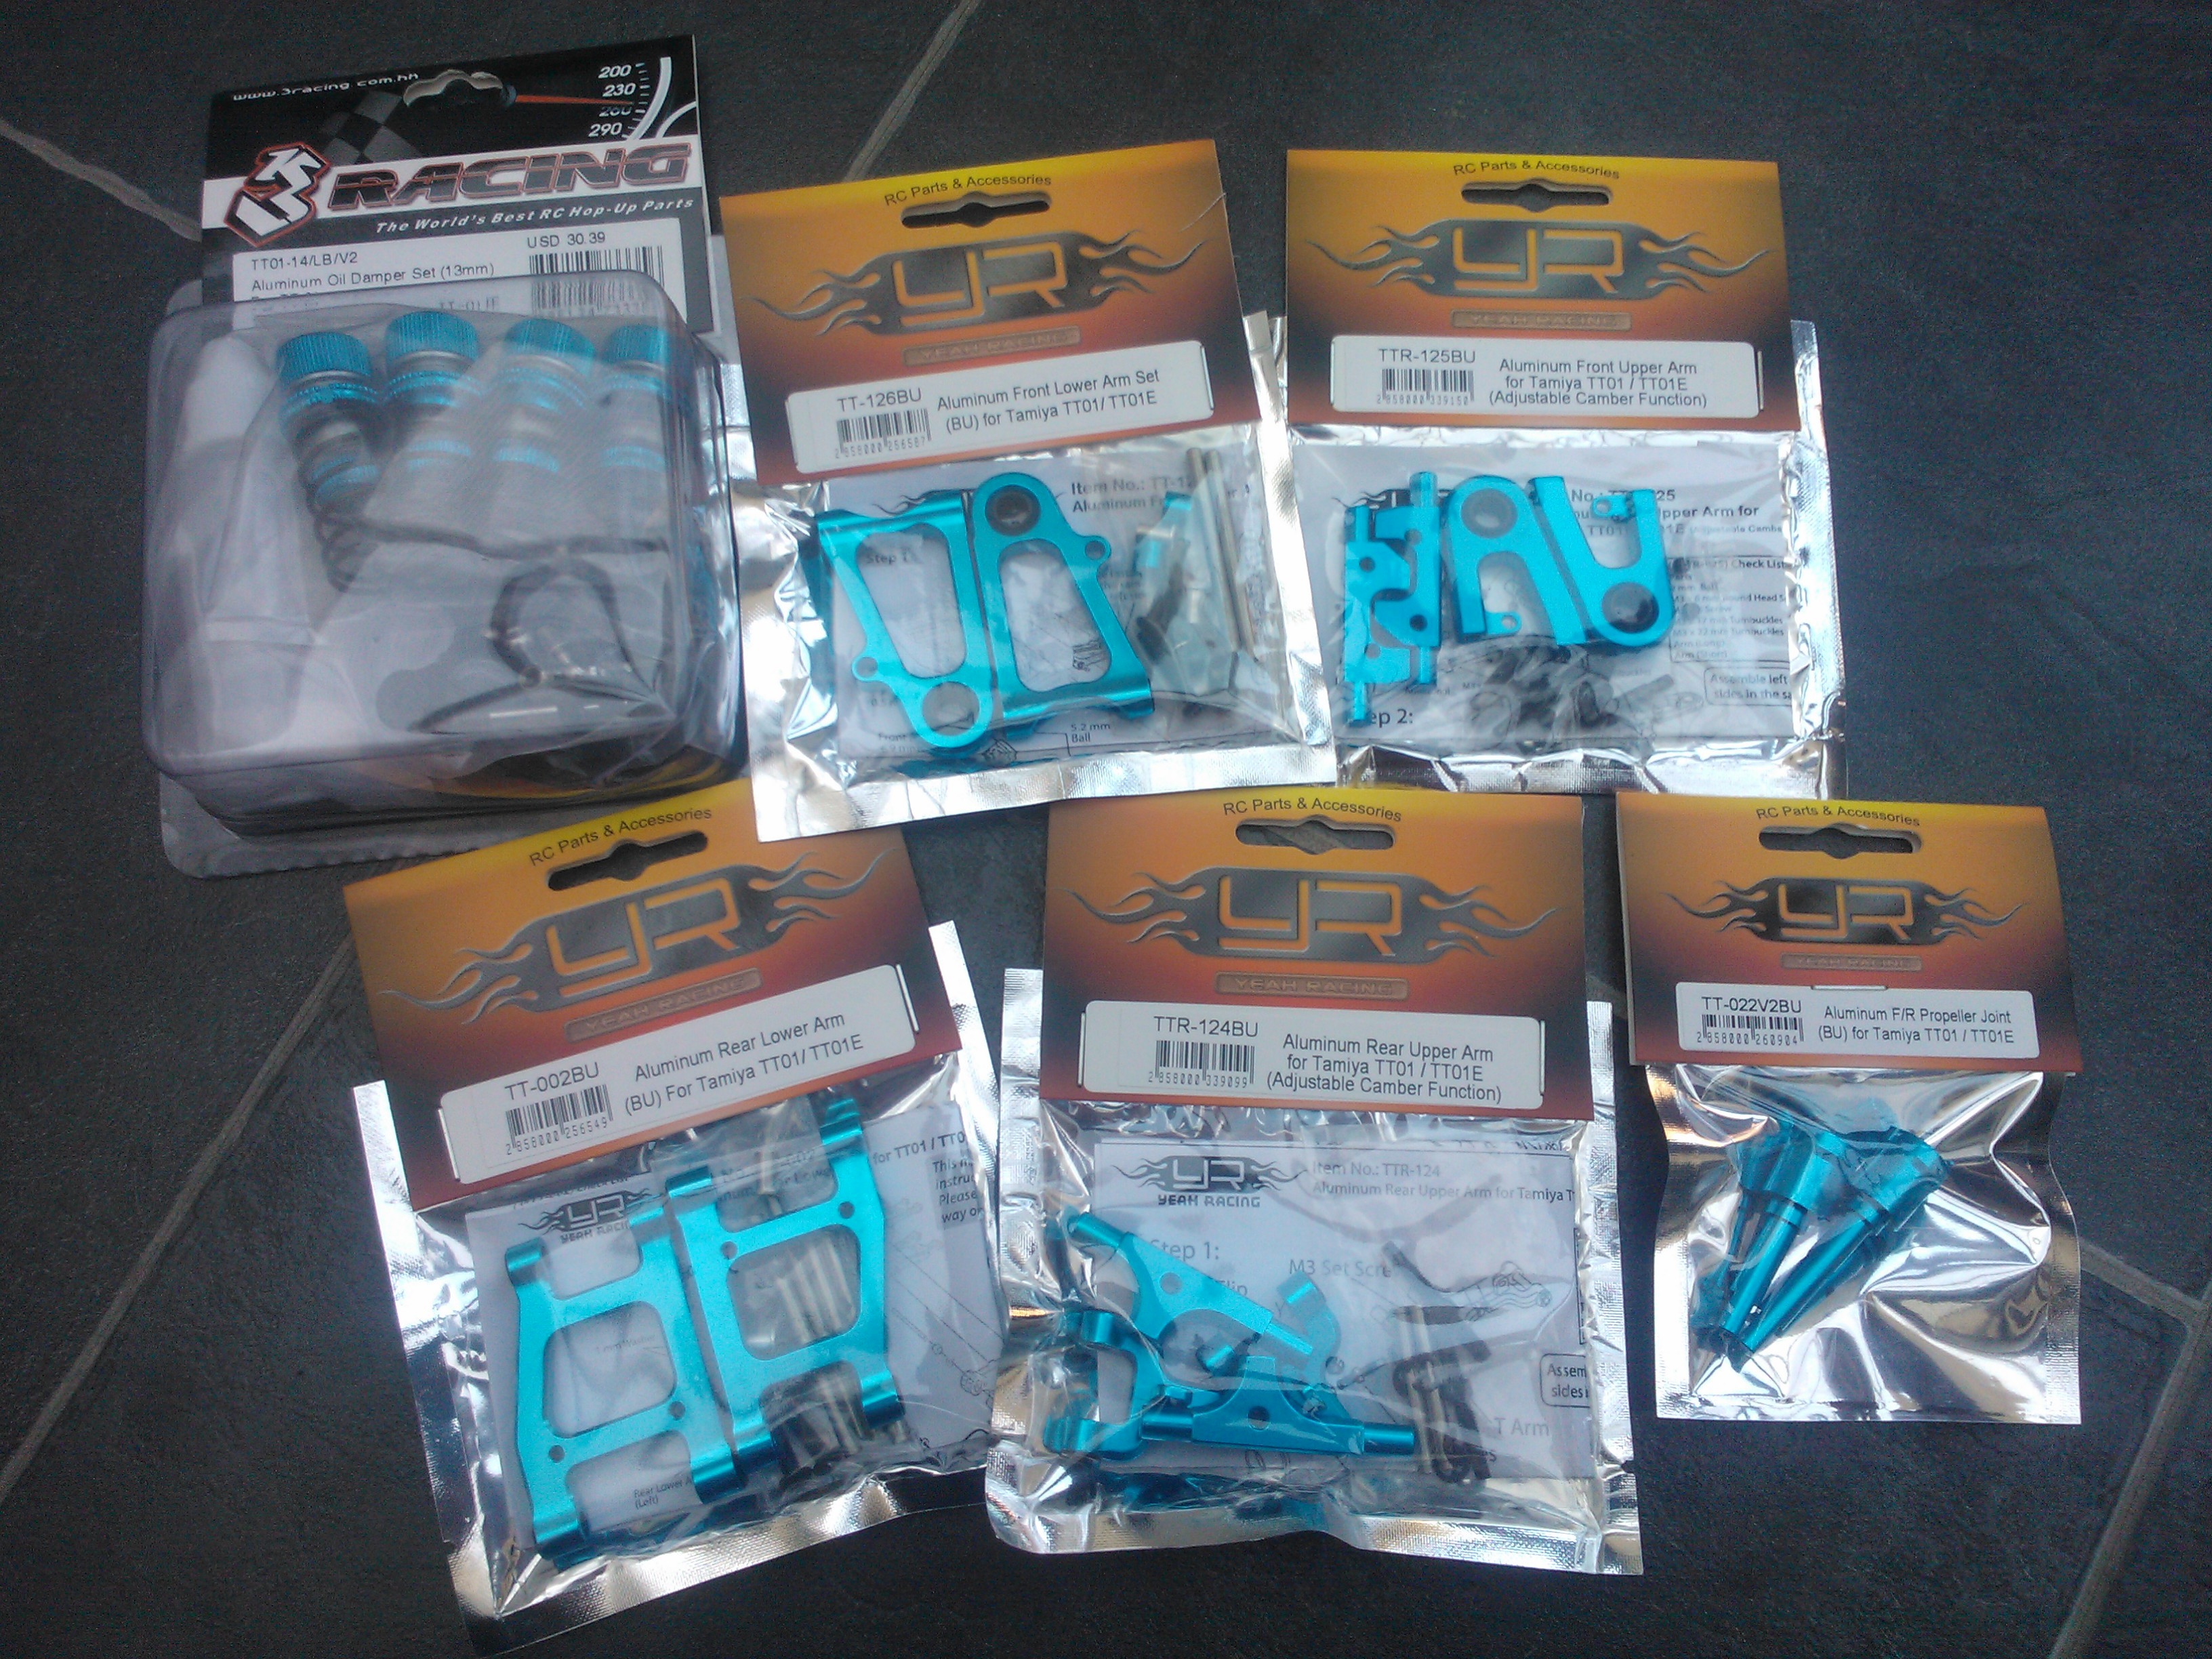
The process for building the 3Racing shocks is pretty standard to any others I have built and the parts were of good quality.

Even the spring was easy to fit which can be a right pain going by the ones I built for the Red Bull car.

These only took a few minutes to build. I think I spent longer waiting for the bubbles in the oil to disappear than anything else. They replace the standard friction dampers you get in most Tamiya kits.

Recently I have been doing some work on my tt01 to finish upgrading and repair it.
Here I have brought some work rims and fitted HPI super drift tyres to them to give the wheels a more customised look than the Tamiya ones that came with the model.

Fitting the tyres to rims is easier said than done. You can heat up the tyres in a saucepan to make them soft enough to snap right on but I have not been brave enough to attempt that yet.
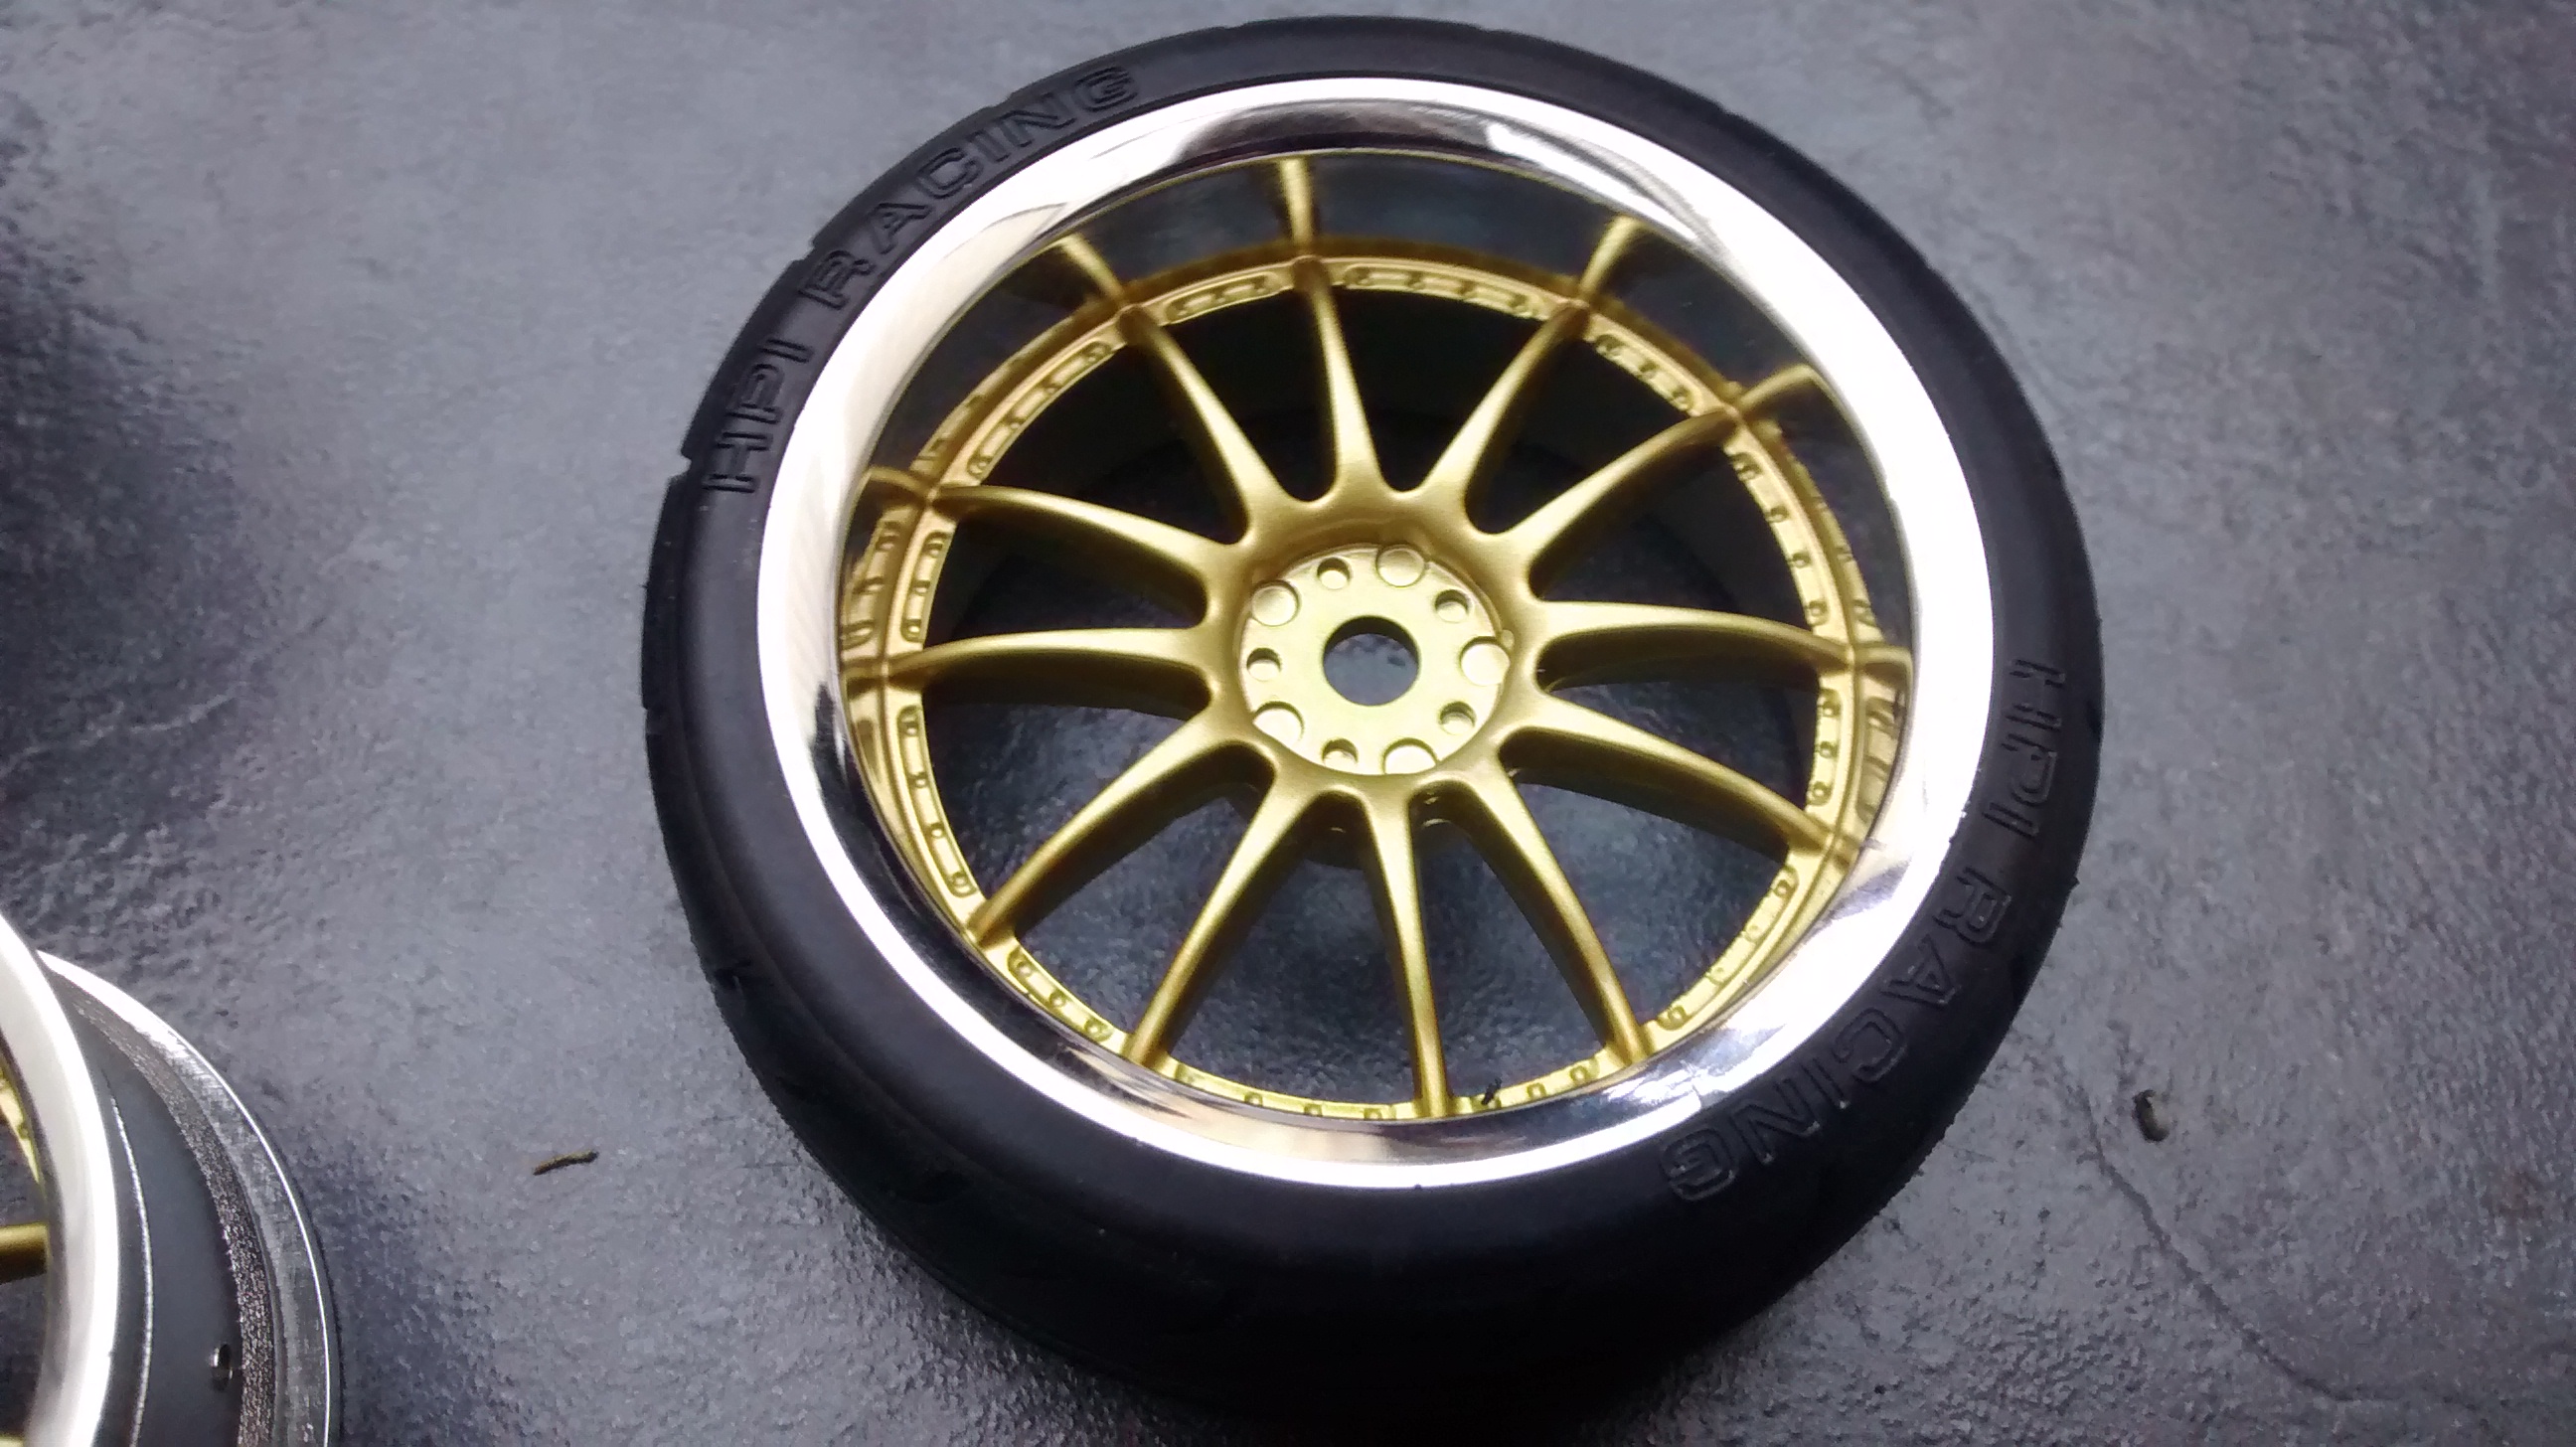
I use a screw driver to work my way round the wheel fitting it into the tyre a bit at a time.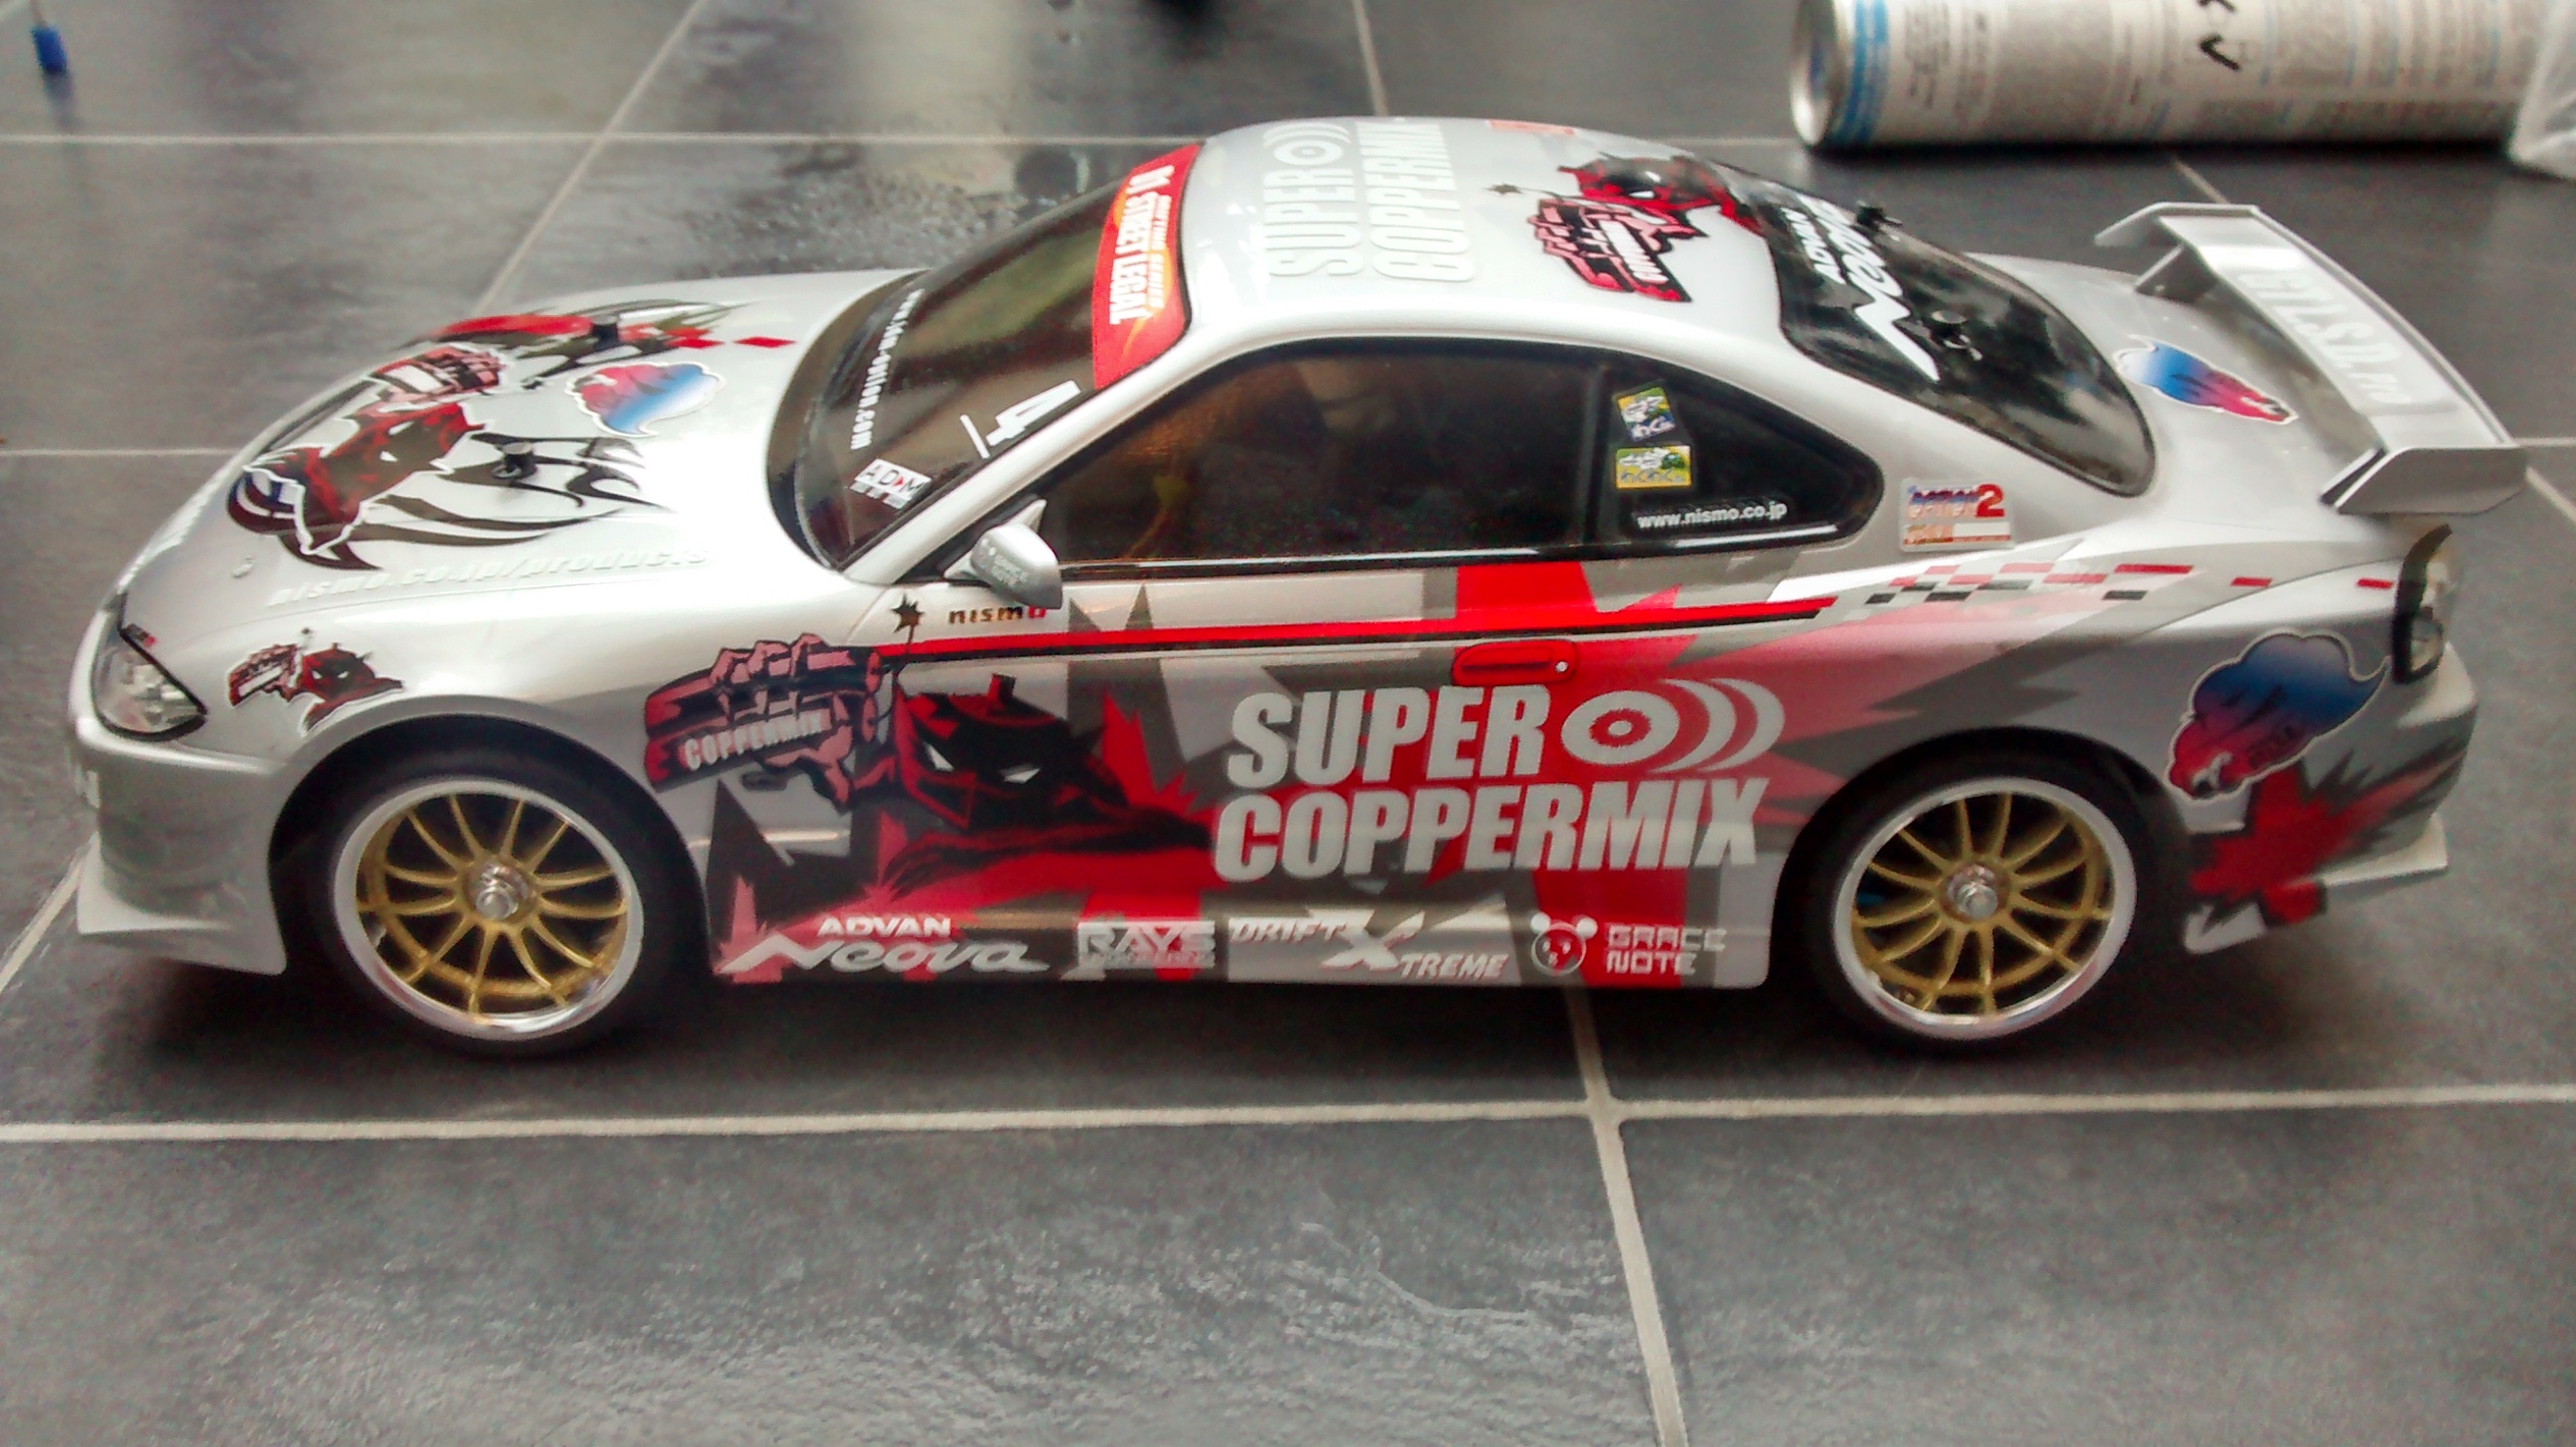
The wheels come with a sticker sheet but at the moment I think they look better as they are without the stickers.

Here is finished model with body shell fitted. I still want to add some sponsor stickers at some point but this is it with most of the Tamiya stickers applied.
I am not a fan of the Stickers that come with Tamiya body shells especially the ones for the windows.
I have not given the model a proper test outside yet but in the quick go I did have with it I noticed the motor is too much for the wheelie bar. Full throttle will put the truck on its roof almost instantly.
I found the sweet spot for wheeling was around 80% throttle.
After landing a wheelie you can then apply full throttle to speed up as the front will not lift again until you slow down.
Over the last few evenings I finally got round to building the Volkswagen Wheelie Camper that I got in the Modelzone closing down sale.
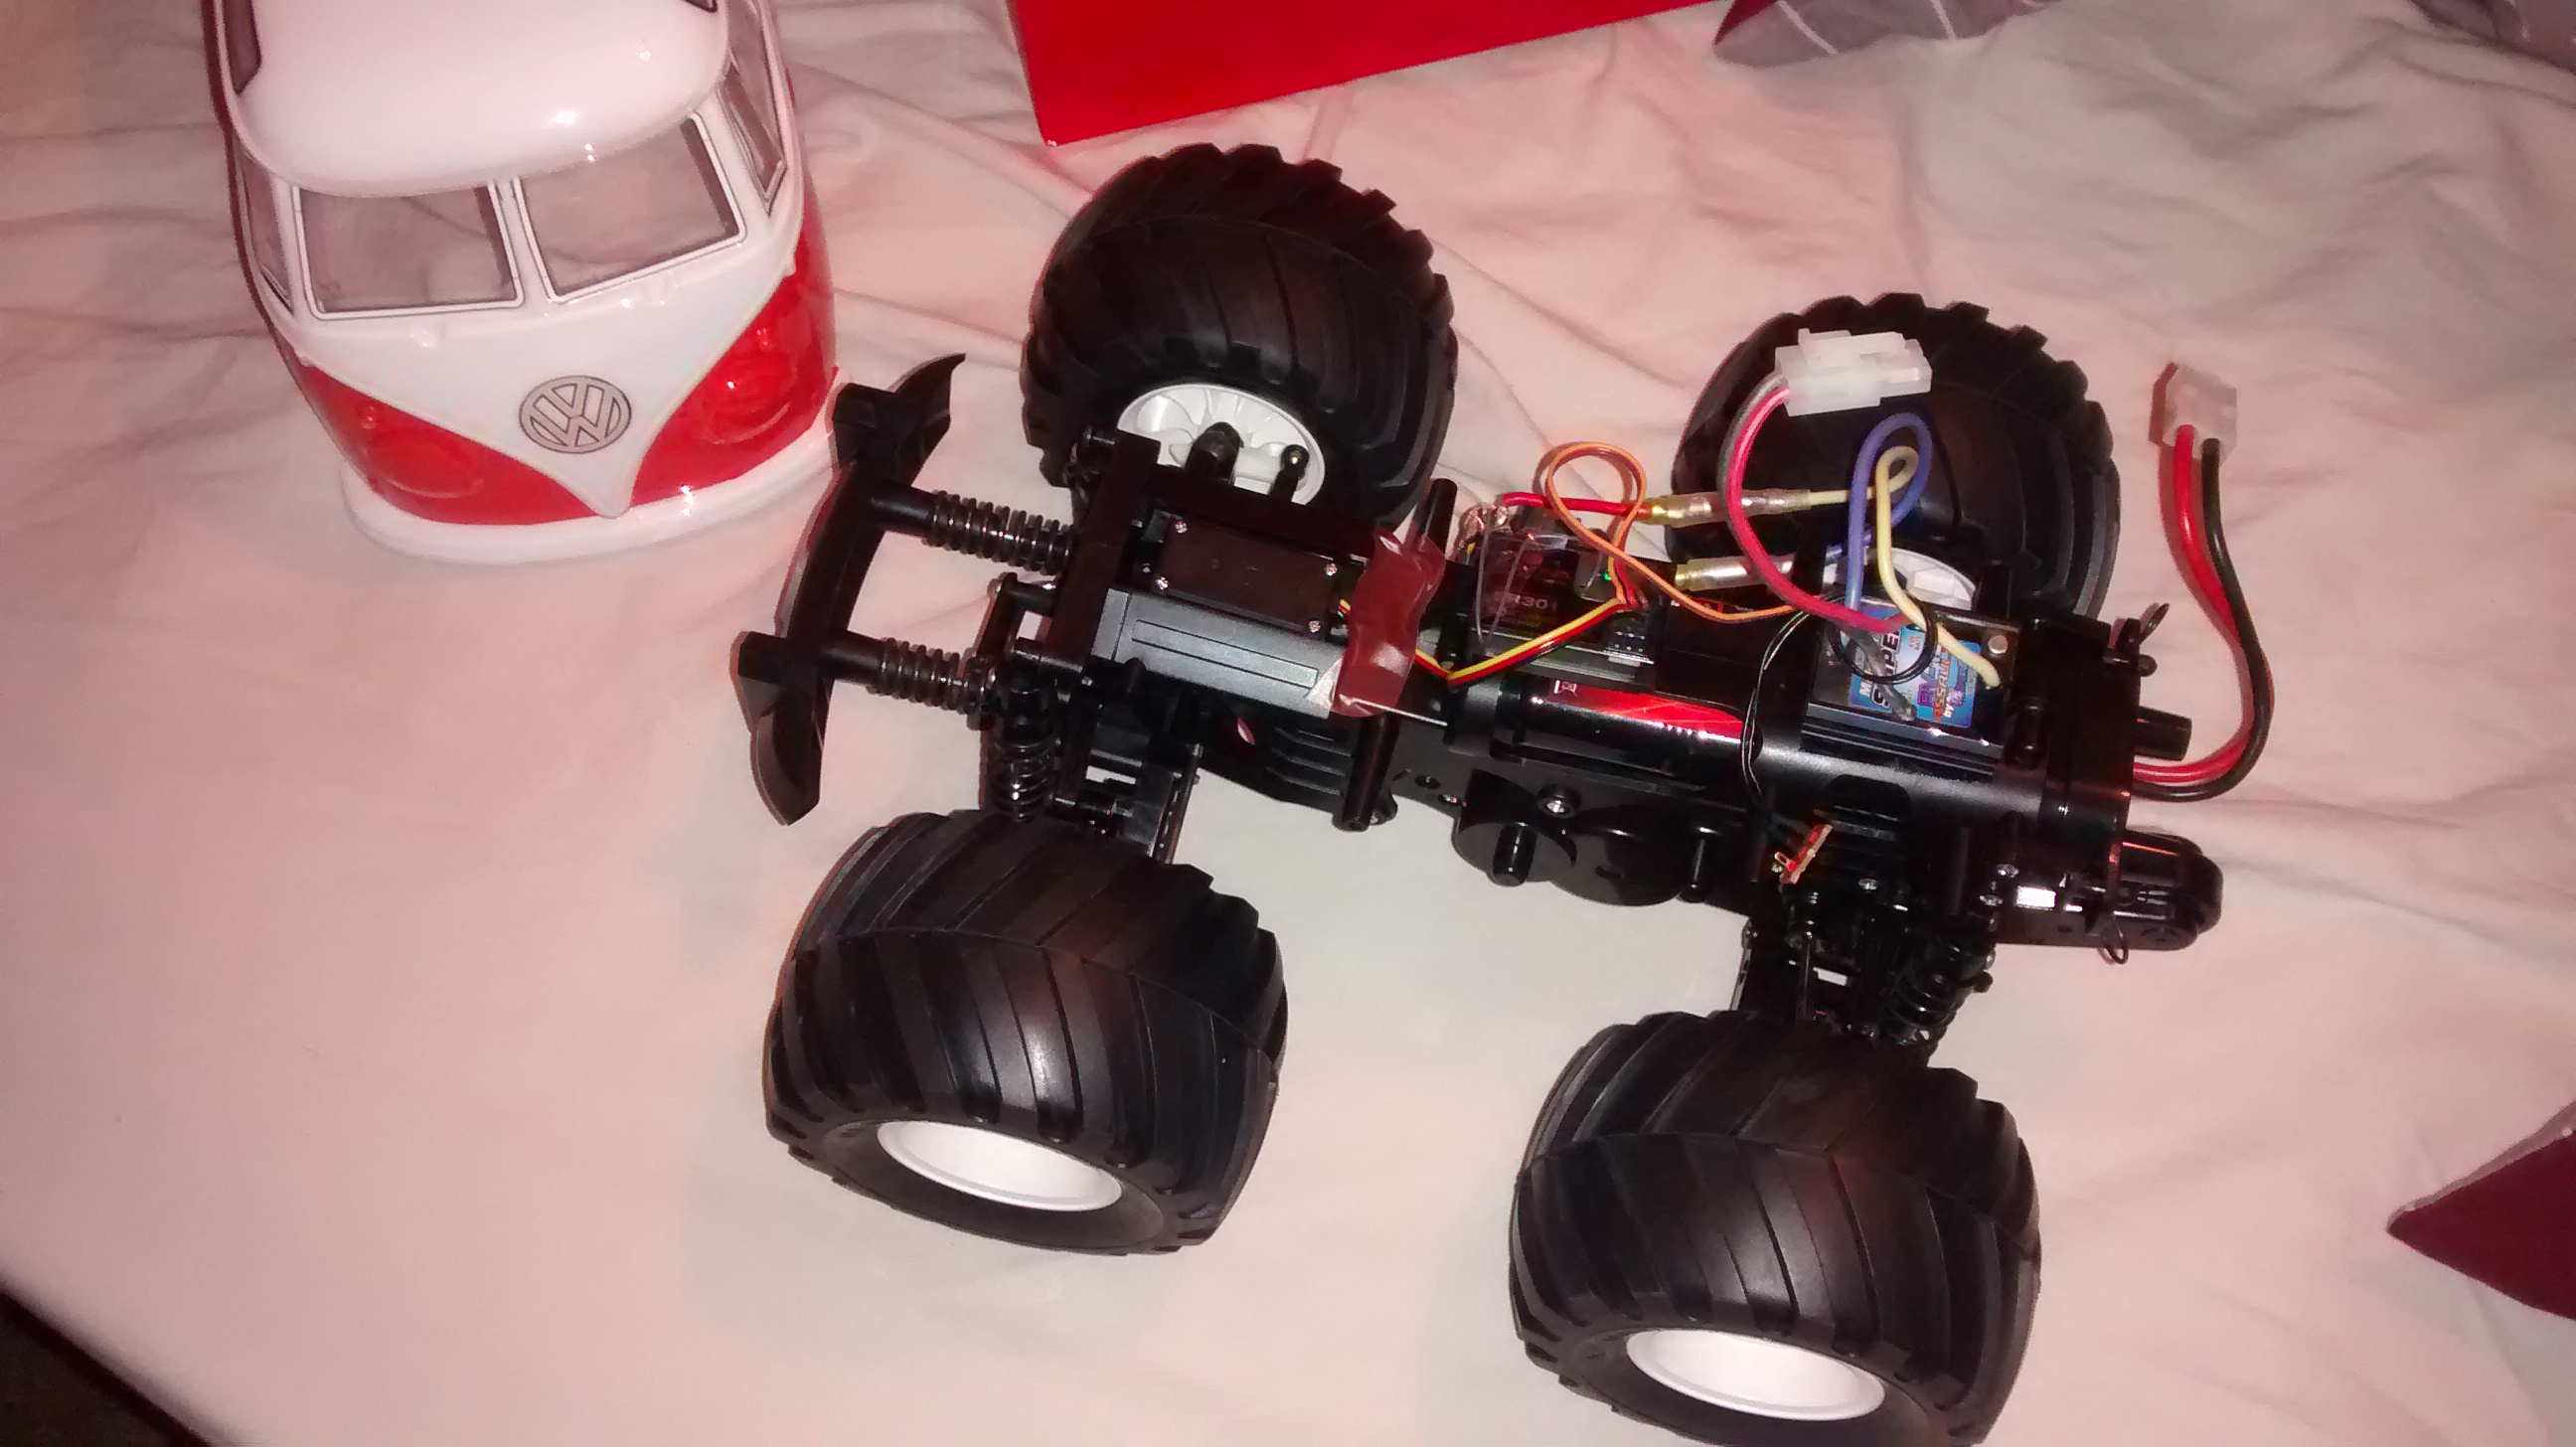
The Car is complete except the body post mounts and the stickers on the bodyshell.
I have replaced all bearings and bushings with ball race bearings and upgraded the motor to a 12×2. This of course also required a different ESC as well.
I gave it a Spektrum splash proof receiver as Spektrum is the only radio technology I use if I can help it. This means I can bind and control all my models from a single transmitter.
Tamiya were a bit cheeky with this kit as it said it included a ball race option pack but there were not enough bearings to go around. Luckily I have a bag of them so this was not an issue.
I made the mistake of giving this a quick test indoors. This lead to it hoping off the spot doing a back flip and smashing the on/off switch.
To fix this I had to solder the wires together where the switch once existed.
I think I will finish mounting the shell before playing with it anymore!
I picked up this kit last week in the modelzone sale but only just received the additional parts needed to complete the model.
It was about half the going price online and eBay.
The box shows it painted white and red but I decided to go for white and orange instead.

The free bonus parts included are ball race bearings. Its pretty handy seeing as the first thing I usually do is replace Tamiya’s crappy plastic/bronze bushings with bearings.
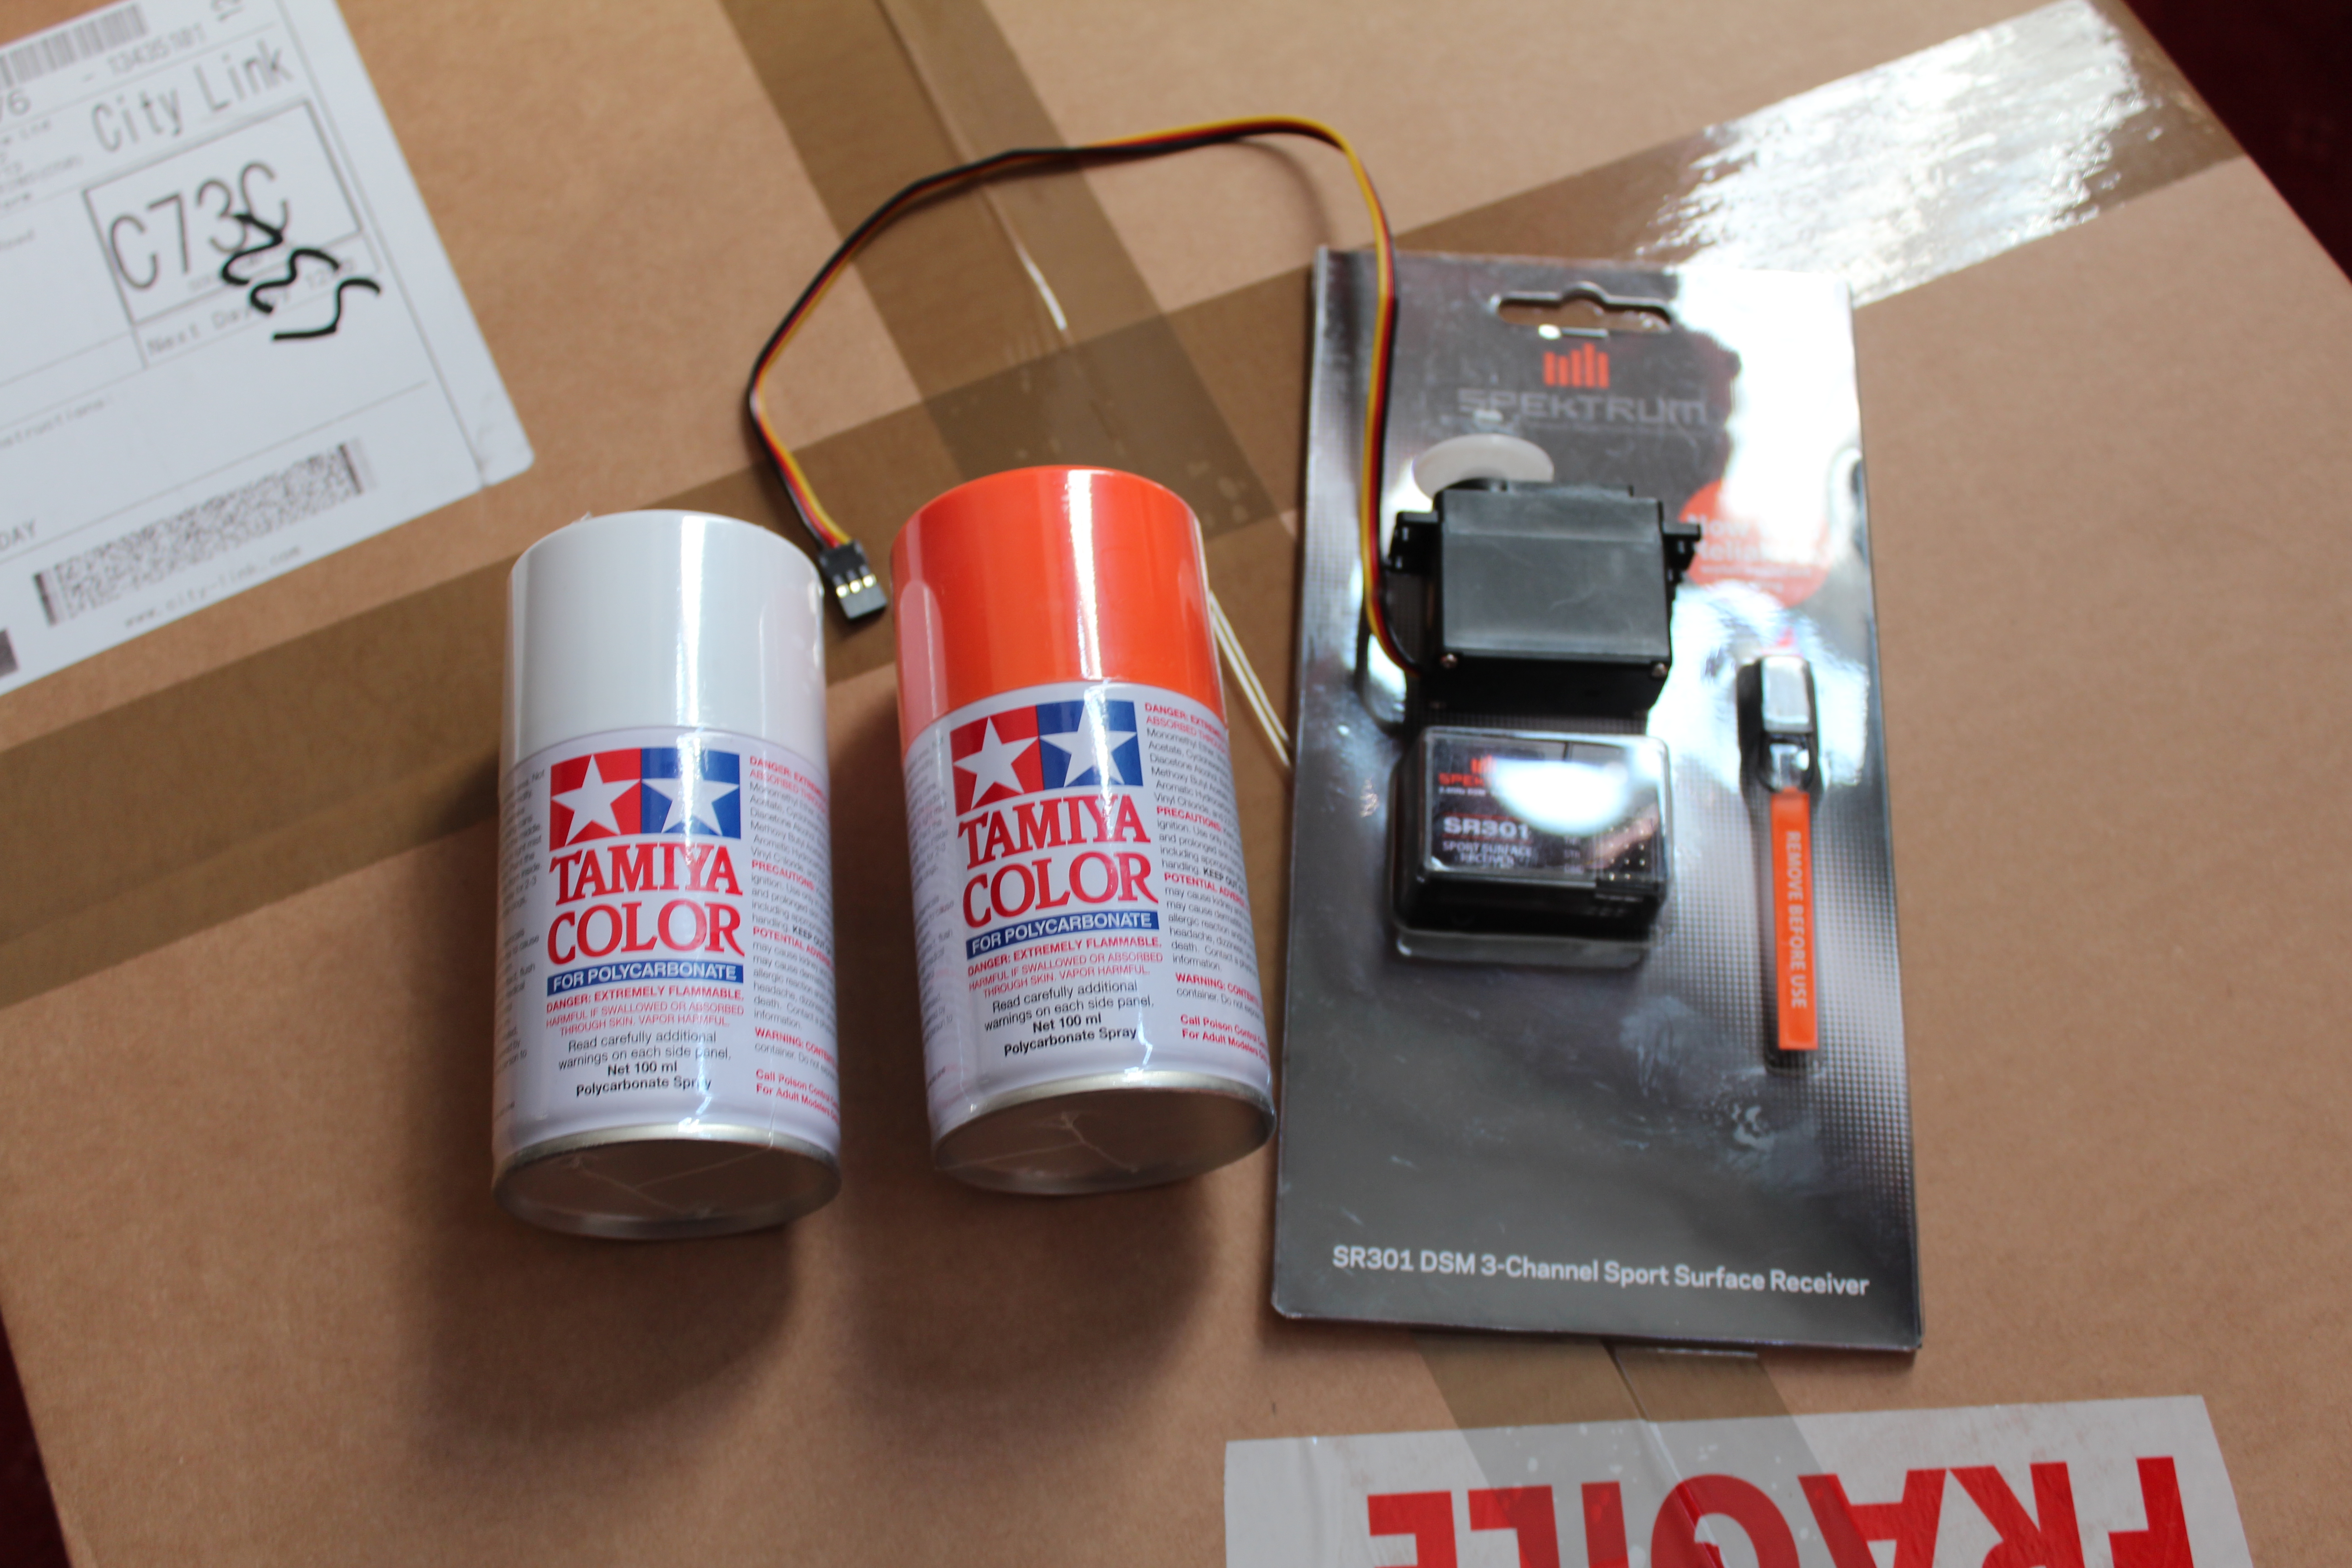
Aside from the paint, I also needed to order a servo for the steering and a radio receiver. As usual I went for a Spektrum receiver in the hope of unifying all my radio gear under one compatible type.


