My tt01 Silvia Coppermix

I have had my eye on the Tamiya Silvia Coppermix drift kit before I got back into R/c.

cop
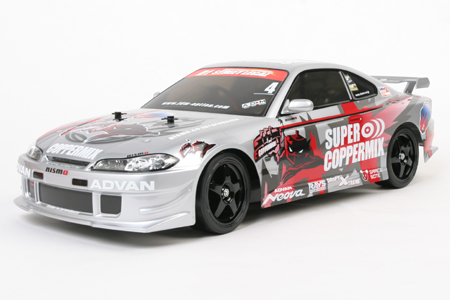
Recently it disappeared from the store I always saw it on and it looks like you can now only import the model from America or Hong Kong.

So I decided to instead go for a standard chassis XB RTR version of the model and upgrade it myself as these are cheaper and more easily available.

It arrived today from Germany and has already had its first upgrades installed.

Front
Front

The initial hop ups I have installed are an aluminum drive shaft and race bearings to replace all standard bearings / bushings.

installing the bearings and shaft
installing the bearings and drive shaft

I found the main gear can be annoying to get back in without taking the rear differential apart. When you take the drive shaft out the bevel pinion gears attaching to the diffs drop making it difficult to re-insert the drive shaft. Good job I had to replace the bearings in the differentials anyway.

All in all its pretty easy to take apart and rebuild.

I have drift tyres and a sport tuned motor on the way as the next step.

Tamiya blackfoot ball-raced

WP_000079
The gearbox

Replaced all gearbox/wheel bearings and bushings with ballrace bearings. (Bearings in photo are originals)

Next in line is a more powerful motor and possibly conversion to Lipo.

New Humvee shell for Tamiya Blackfoot 3

WP_000074

This is a Proline Hummer H2 body shell for my black foot 3.

It is painted with Tamiya lame flake and a black under coat.

This is the first time I have had a go with flaked paint and I am pleased results.

Next for the blackfoot is some hopups I have to install.

Blade MCPx Helicopter Repairs and Upgrades

I was a bit adventurous last time I took my MCPx out and started attempting to fly upside down.

Although I did manage a pretty sketchy barrel roll I eventually crashed and snapped the tail boom and landing gear.

Before
Before

I started googling for parts and found their are plenty of upgrades available for this helicopter.

I brought a stronger longer tail boom (still and official part for the heli) and carbon fibre landing skids.

I was tempted by an aluminium tail boom but I figured this would just impart the force from a crash onto the main frame instead.

After
After

Adding lights to your RC Car


A short video I made showing a simple lighting circuit that is running off of an external power supply.

The LED’s shown in the video would not light up using the led controller I installed so I had to run them off of a 9V battery instead.

New body shell for my sledgehammer S50

I decided my sledgehammer needed a bit of spicing up and always wanted to add lights to it so it made sense to buy a new shell.

I wanted it to be a truck body so went with HPI’s Ford-150 shell for savage monster trucks.

Here it is as it arrived.

image
The uncut and unpainted shell.

Checking out my new action cam on an rc tank

In this video i am testing a new miniture camera on my Heng Long Panzer IV. The quality is not great as its indoors and in low lighting. The camera comes with about 4 ways of attaching it to things but I just used blutack. Am certainly going to get the HD version of this camera.

Helicopter Camera Pod Mod

I have had this idea for a while now but have had to wait till I got a helicopter with a decent fuselage to attach a camera pod to. Most reasonably priced helicopters that come with a camera are not very good so I have always wanted a mod a camera onto a decent single rotor one.

I recently brought the Hubsan Lynx single rotor that has a nice amount of flat space to attach an adhesive strip to.

This is a really simple mod. All you need is some picture hanging strips and a spy camera.

There is a large selection of spy cameras on Amazon and I brought a few different types to mess around with. The one that I decided to use with this mod fits the hanging strip nicely so I chose that one.

All you need to do is attach one strip to the camera…

…and the other to the underbelly of the helicopter.

The camera sticks really well and I am sure it will hold just fine.

The only problem I see so far is that the camera protrudes the landing gear so taking off could be tricky.

That’s all for now. Will hopefully test it at the weekend.